View Sidebar

Thanks for stopping by!

Katrina’s World is just that – it’s all about me and my world. I’m Katrina Rauch, and I’m a mompreneur that loves to help people! Katrina’s World is all about helping you be a better mom, wife, and entrepreneur! My posts include tips on cleaning, cooking, couponing, crafting, giving, gardening, ways to save money and make money, and so much more! Enter your email on the left and join me so I can keep in contact with you!
Time To Tidy Up: Hello 2017

Time To Tidy Up: Hello 2017

TimeToTidyUpI’m happier than I should be that 2016 is over.  I have no regrets about leaving that year behind me.  It wasn’t a horrible year, it wasn’t a great year, it was just a year and I’m over it.  I’m happy to welcome 2017 and have high hopes that it’s going to be epic!  While I’m trying not to get ahead of myself or of what the Lord has in store for me this upcoming year, I’m still feeling very intrigued about what lays ahead.  Last year was an “off” year for me.  I struggled a lot with my emotions, my overall body contentment, and mostly with my sense of overall purpose and direction in my life.  Heavy stuff huh?  Yeah, I know, and it was hard to wallow through it all.  I feel like dreams I had built, toiled over, and angrily suffered through were laid to rest, friendships were built and lost, days of pounding my body in the gym were accomplished with not much gain, and I registered defeat in more ways that I want to count.  I learned that God doesn’t always write out His plans for your life on a neon sign, clear as can be, so you don’t mistake it – He just asks that you trust Him even when you have no idea what is going on.  I was in that space so many days this year that I found myself doubting who God is and if He really is there for me – and in all my days on this earth, I have never doubted God’s love for me.  Now do you see why I’m read for this year to be over?

I learned something else about myself that I’ve never seen before – I don’t function well in chaos.  I get stressed out really easy and it doesn’t take much for me to go from “good mommy” to “crazy-stressed-angry mommy” when the situation becomes overly chaotic.  When I get stressed, I instantly go into overdrive of trying to de-stress – I clean my environment, I yell, I get mad at my kids, I start making lists, little things out of place make me yell even louder, I demand that my kids pitch in and help me clean, I just turn into a crazy person trying to tidy up and ultimately calm down.  A classic example is everyday when my older kids get home from school.  They come in the door and set their backpacks in the middle of the floor of the kitchen and start unpacking them, wanting to show me everything inside – the craft they made in class, their math test, the art project they are working on, their spelling homework, etc.  All while my youngest (who has been home with me all day) is vying for my attention as well, wanting a snack, drink and to show me anything he can find at that moment to show me, plus he is usually singing a silly song about stinky farts at the same time (lovely – huh?).  While all this is going on, I usually have music playing in the background (yep, because I’m crazy) and am trying to prepare a snack so we all can re-fuel before starting homework.

This mom does not smile through all of this, nor do I patiently listen as they show me items, or do I calmly ask them all to sit at the table so we can eat a snack.  I try to take a deep breath, then my heart starts to beat faster as I get more and more stressed by all the chaos of kids, dishes, dinner prep, laundry, homework, shoes in the middle of the floor, backpacks not hung up, etc and I end up yelling and throwing a mommy tantrum trying to get everything back to a normal stress level.  This is so dumb.  It usually puts the kids in a bad mood and me too and then we all spend more time trying to repair our attitudes towards each other.  By this time, it’s 5pm, and I’m stressed and starving and all I want to fix my sour mood and chaotic feelings running through me is a brownie.  Yep, I love brownies – but you all know that.  I’ll make dinner and simultaneously whip up a batch of brownies.  You see where I’m going??  It’s a horrible downward spiral.  Chaos and stress are detrimental to me and where I’m going in life.   I know I can’t eliminate all the stress in my life, I mean seriously, I have 3 kids, life is going to be stressful, but I can help identify the stress triggers and work at fixing them.

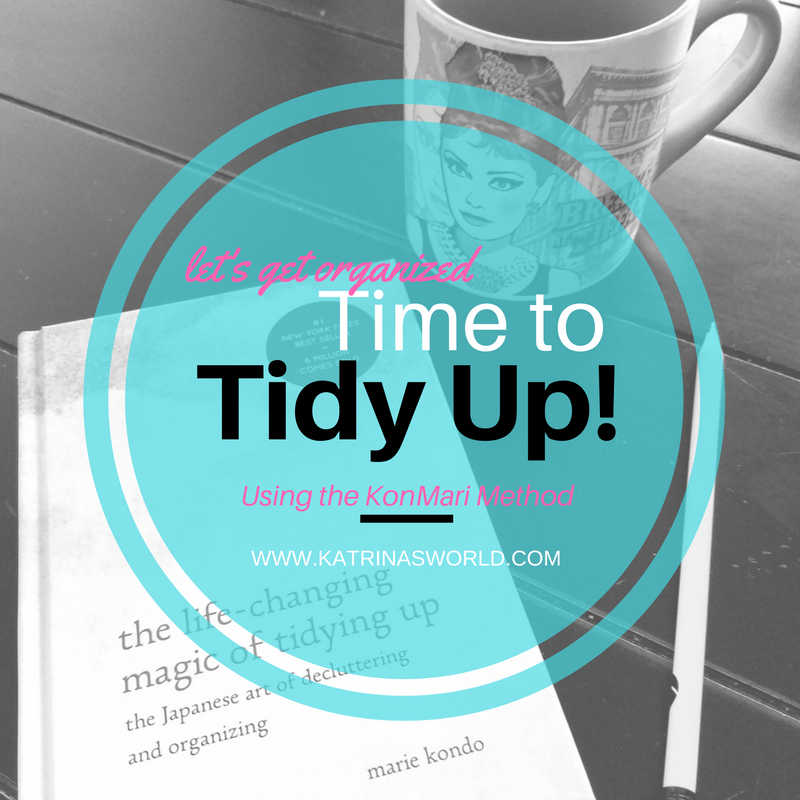
A very dear friend of mine told me about a book she is reading, The Life Changing Magic of Tidying Up, by Marie Kondo.  This book caught my attention because I love to organize and I love the feeling of a tidy house.  I love to discard stuff, sell it, and move on.  My house is usually very tidy – but it could be so much more simplified.  I’m totally hooked on this book.  I’m only about 40 pages in, but I’m hooked!  I’m going to spend the next couple months reading this book, doing what it says and tidying up my home, heart, and my life, and I plan to blog about as I go.

In her book, Marie asks “Why do you want to tidy?”  When you can answer that question you can begin.  For me, I want to tidy to because I want to have a clean and orderly house so that I don’t feel stressed out by my environment.  If I’m not feeling stressed out by my environment I can pay more attention to trying new things, having more fun with my family, eating healthier foods, getting better sleep, and overall being a better wife and mom.  I do believe that all of these things can be accomplished by having a tidy home, because your home is so much more than just the place to lay your head at night.  As a mom, it’s my work – it’s where I put my time and energy, it’s how I make money, it’s how I prove my worth, it’s who I am at this point in my life.

I’m hopeful that God teaches me a lot about myself and the deep-rooted reasons why I do some of the same things over and over and expect a different result.  I want change, which is really hard to say, because I HATE change, but I’m ready for it.

Have you read Marie Kondo’s book?  What did you think?  What did you learn?

TimeToTidyUp

Share this post:
facebooktwitterpinterest
January 3, 20170 commentsRead More
Katrina’s Coupon Tip #14 – Call Your Cable Company

Katrina’s Coupon Tip #14 – Call Your Cable Company

CouponTip14_CallCableCoDid you know that you can save money each month on your cable bill by calling them?  It’s really as simple as that – promise!  You know how I feel, you sign up for the 2-year introductory price that is a smoking deal + they give you extra channels and then your husband loves you because they also give you all the NFL channels for FREE.  But there is a catch, this deal is only offered for the first 2 years and by then, you know you LOVE their service and all the amazing channels.  It’s like a punch to the gut when you get your first bill after this 2-year introductory period is over and the bill is tripled in price.  Ugggh!!  For a money-saving mom like me, I just couldn’t imagine paying full price for our cable bill.  It was either stick with our current cable company and hope for a discount or switch to another cable company and see what type of introductory deals they could offer us.

Between you and me, I love our current cable provider so I was hoping that we would not have to switch, but we didn’t want to keep paying the high prices.  My amazing husband decided to give our current provider a call and see if there was any way we could cut down on our bill – or he was going to end our contract and switch to someone else.  You know what?  Calling them was a great idea!  He saved us a ton of hassle of switching to a different company and having to deal with changing equipment, etc. by just asking for a discount.  Crazy huh?  He was able to negotiate a $63/month discount + new equipment upgrade – all from simply asking for a deal!  In fact, our cable company told him that we could call them every 3 months and ask for the current promotion to be applied to our account for future savings with them!  Woot!  Woot!  I’m super excited!

Remember, if you call your current provider, they may not be able to give you the same discount we received, but it doesn’t hurt to ask and shop around!  Just remember to be polite – no need for demanding a deal.  If they don’t give you the type of discount you want, then call another provider.  Being polite goes a long way in receiving special deals – keep in mind, the company needs to make money too, so don’t be unrealistic when asking for discounts.

CouponTip14_CallCableCo

Share this post:
facebooktwitterpinterest
November 29, 20160 commentsRead More
How To Clean An Artificial Christmas Tree

How To Clean An Artificial Christmas Tree

CleanChristmasTreeLast year around Christmas time I was really struggling with my allergies and I noticed that my allergies seemed a lot worse right after we put up our 15 year old artificial Christmas tree.  I didn’t make the connection at first, but I did notice 6 weeks later when we finally packed up our tree that I almost instantly started breathing better.  A light bulb went off in my brain and I realized that my Christmas tree may have been a big part of why I had been so sick during the holidays last year.

This year I’m determined to feel better during the holiday season and I decided it was time to clean my Christmas tree, afterall, we’ve had if for 15 years!  Honestly, I can’t believe that we have had this tree for so long, it’s super ‘old-school’, has individual branches that have to be put on one by one, but it works and it looks really nice once it’s all set up.  Don’t get me started on how long it takes to assemble, add the lights, and ornaments (I hate this job as much as my kids love it), but today I’m thankful that I don’t have a pre-lit tree because if I did I would never be able to clean it so thoroughly.  I’m super envious of all of you out there that have pre-lit trees – the ease, the simplicity…oh man….(drooling over here), but I’ve also heard horror stories about how the lights malfunction.

ANYWAYS, back to the topic at hand….as I was saying, I’ve got this super old, fake tree and I was bound and determined to clean it.  I begged my husband to get out the box from the basement and haul it outside to our back porch – it was warm, 80 degrees the day we did this.  Here’s what you need to do:

Supplied Needed:

  • Spray bottle
  • Lemon Juice
  • White Vinegar
  • Hose
  • Artificial Christmas Tree

Directions:

I gathered up the kids and had them lay out each branch of the tree.  I gave each of them a spray bottle filled with a solution of white vinegar, lemon juice, and water and asked them to spray all sides of each branch.  I let that sit for about 15 minutes and then I got out my hose and sprayed off each branch completely.  After all the branches were thoroughly rinsed, I shook off the excess water from each one and laid them on the dry patio in direct sunlight.  I left them outside to dry for the entire day and flipped them over about 5 hours into the day.  At the end of the day I made sure they were completely dry and then I packed the branches back up in the box and was done.

They smelled GREAT too!  I’m super hopeful that this cuts down on the all the dust and helps keep my crazy allergies at bay.  It sounds time consuming, annoying, and hard to do, but it was super easy, quick and I feel great knowing it’s over and done with!  Hope that helps!  You can do it too!  Let me know if it helps – I’m crossing my fingers that it will help my household breathe better this Christmas!

CleanChristmasTree

Share this post:
facebooktwitterpinterest
October 25, 20160 commentsRead More
DIY Easy Pinecone Door Hangers

DIY Easy Pinecone Door Hangers

HowToMakePineconeDoorHangersFall is my absolute favorite time of year!  It makes me want to bake, decorate and craft all at the same time!  I see a pumpkin and all of a sudden I need a Pumpkin Spice Latte and a whole bunch of glitter and I’ll whip up something amazing!  Last fall I made a whole bunch of glittered pinecones for a magical tea party that I hosted for a bunch of women who were very dear to my heart.  I saved the pinecones (thank goodness) and this year I decided I wanted to use them to create door hangers for my double front doors.

I struggle with how to decorate my front doors because there are two of them!  It’s hard to figure out what I should put on them as decor.  I feel like I need two of every decoration and that drives me crazy, especially when I want to make a wreath and know that I have to make two of them.  I’ll let you in on a little secret, if you think I’m obsessed with glitter you are totally right, but I also have an obsession with wreaths as well.  Call me crazy, but it’s true.  When I see an adorable wreath on Pinterest or hanging on my neighbors’ front door, I get super excited, but then immediately annoyed knowing that I’ll have to double my efforts in order to put them on my front doors.  Knowing the pain it is to duplicate decor for my front door, I was pretty excited when I came up with this idea to make quick pinecone wall hangers.

A lot of the stuff I create and do is born out of necessity or because it’s quick, easy, and is made from things I have laying around my house already.  I know you may not have all these things magically laying around your house, but I’ll give you a good idea on how to locate the necessary items so that you can quickly make these too.

The supplies below are enough needed to make 2 door hangers.  If you have only 1 door, you only need 10-12 pinecones.

Supplies Needed:

  • 20-25 Pinecones (Small, Medium and Large Sizes and Shapes) - I found mine in my neighborhood under a couple different pine trees so I could have different shapes and sizes.  You can also buy pinecones at any craft store.  
  • Mod Podge Gluing Medium
  • Foam Paint Brush
  • White Glitter – Large Flakes and Super Fine Flakes
  • 1in Brown and White Striped Craft Ribbon – 1 yard (For Decorative Bow)
  • 2in Red Wired Craft Ribbon – 3 yards (For Roses)
  • Glue Gun - I personally like the HOT temperature glue guns, I feel like they glue stuff in place better than the low temperature ones.
  • Glue Sticks
  • Twine
  • 2 Paper Plates

How To Make  Glitter Pinecone Door Hangers:

  • Choose a pinecone and paint it heavily with a layer of mod podge.  Mod podge dries clear so don’t worry if it’s not perfect.  I like a lot of glitter so I used a lot of mod podge.
  • Over a paper plate, sprinkle the large flake glitter all over the pinecone and shake off the excess. Don’t worry if you don’t cover it completely.
  • Sprinkle the super fine flake glitter all over the pinecone filling in all the spots missed with the large flakes.  Cover it completely and shake off the excess.  Set the pinecone aside to dry.
  • Repeat the above steps for all the pinecones.
  • While the pinecones are drying, cut twine 28 inches long.  Cut as many twine pieces as you have pinecones for.Pinecone2
  • Cut your 1 yard brown and white striped craft ribbon in half into two equal strips - this ribbon is for the decorative bow.
  • Cut two 8″ strips of red wired craft ribbon – these are for the roses that go on the bow.
  • Cut eight 6″ strips of red wired craft ribbon – these are for the roses that go on the pinecones.
  • While you wait for the pinecones to finish drying, you can make the roses.  Plug in your glue gun.
  • Take one of the 8″ strips of red wired craft ribbon and fold one of the ends into each other and begin wrapping it around the center.  Twist the ribbon as you go and continue wrapping it around the center to make the form of a flower.  Place a small dot of glue on the side as you are wrapping around the edge to glue the flower in place.  Continue wrapping, twisting, and gluing until you have used all the ribbon.  When you reach the end you will glue the ends around the back of the flower to finish it off.
  • Make all 10 roses and set aside.  Each of them will look a little different and be a little different in size, which is ok!
  • After all the pinecones are dry and covered with glitter select a larger one and turn it upside down so that the tip is pointing down.  Find a small spot where one of the scales of the cone is open and squeeze in some glue.
  • Take a piece of cut twine and secure one end it into the glue, this will hang your pinecone.  Make sure you have enough glue to keep the twine secure.
  • Add twine to all of your pinecones.
  • Divide your twined pinecones into two equal piles of number and sizes.
  • Start with one pile and one by one pick up a twined pinecone and start arranging them, holding them by the twine.  After all have been arranged nicely tie a knot with all the twine at about a yard in length, or as long as you want them to be.  The knot is how they will hang on your door, so you pick the length.  After you tie off the knot, and are happy with the length, trim the extra twine ends.
  • Assemble the second set of pinecones and repeat the above step, making sure they equal in length so they look good hanging next to each other on double doors.
  • TIP: I hung my pinecone sets on hooks next to each other and assembled them while they were hanging.  This helped me know exactly what they would look like when they were finished, and I also made sure they will even in length.
  • Take your brown and white striped craft ribbon and tie a bow around the twine and slide the bow downward towards the cones to where they are almost touching the top cone of one of the sets of pinecones.  Repeat with the other set.
  • Take one of the 8″ roses and glue it right in the middle of the bow.  Repeat with the other set.
  • Take four remaining roses and glue them on the top of 4 of the bigger pinecones in one of your sets.  Repeat with the other set.
  • Done!  Go hang on your front door!  Way to go!

I Promise these are easier than you think!  You can also choose different colors of ribbon for your bow and roses if you’d like.  I used the colors I had already at home and they just so happen to match a pinecone wreath I made a few years ago that I hang near my front door.  You can absolutely do it!  Snap a photo if you decide to try them, I’d love to see how they turn out!  Way to go momma!


HowToMakePineconeDoorHangers

Share this post:
facebooktwitterpinterest
October 13, 20160 commentsRead More
Why We Didn’t Take Out A Loan For A Car

Why We Didn’t Take Out A Loan For A Car

GreenCarBeing an adult is hard.  So hard.  Here is what happened yesterday – are you ready for this? Here goes:

We need a new car in a bad way.  Check this baby out - this is my Dave Ramsey-mobile.  It’s a 1993 Honda Del Sol convertible- lime green with lime green wheels too, it was a beauty when I got it 20 (gasp) years ago!  Who’s heard of Dave Ramsey?  Love him!  Consider him my uncle – for real.  Around our house we call him ‘Uncle Dave’.  Well, when we first got married someone gifted us with his Total Money Makeover class and our newly married lives were completely changed – in a good way.  We had $90,000 of debt when we got married and after taking his class we were able to pay off ALL of that debt in just over a year.  We got extra jobs, worked out butts off and lived on beans and rice.  Boy was I glad the day we payed the last debt off!  I was so proud of us.  Now, we are 14 years down the road, still living debt-free and we never fight about money – which his a huge plus!  BUT, we really need a new car – this lovely Dave Ramsey-mobile is on it’s last leg.  In fact, this was the first car I ever had – I was given this car when I turned 16 and that was a long time ago.  My poor husband drives it to work every day and has for years and years.  It’s reliable, paid for, and does the job, BUT, we are ready to move on to another vehicle that we can fit our kids in.  As you can see, this car is on a 2-seater, and that’s hard when you have 3 kids.  :)

My husband would like to get a truck.  I would too.  Who knew that trucks hold their value so well?!  Not us.  We know that now.  We have been saving for a few years, anything extra at the end of the month and we have managed to save $10,000 – which is not going to buy much of a truck – we’d need double that to get something that will last us a few years.  The little green car will need some work put into it this fall – and honestly, the repairs are not worth it if we plan to sell it.  Which means, we are in the market for a newer vehicle.  Although my husband would really like a truck, we have decided the ‘adult’ decision would be to get a car instead, as they are cheaper, and we can pass it to our son who will be driving (gasp) in 6 years (ohmygosh, I can’t believe he will be driving soon….ahhh!!!).

With new resolve, we began looking on Craigslist for a 4WD car with lower miles, and only a few years old.  Imagine my luck when not an hour earlier someone had posted a gorgeous sedan, a few years old, with only 30,000 miles on it – asking only $13,800, claiming he was a very motivated seller.  The blue book on this car was mid $14,000′s.  My bargain hunting ears were fully listening.  Just what I like to hear – someone who took really good care of his car and was motivated to sell and offering a deal.  Of course we had to go check it out.  We were the first people to call him and went to go look at it last night.  It was beautiful.  Really – just like his Craigslist post said.  We talked him down to $13,400 – even better deal.  Then we shook hands and said we needed to talk about it first and he said he would hold our place in line, but he did have a handful of others interested.  We talked about it the whole way home.  What would you have done?

It’s now the next day and we don’t have the car.  I’m super sad, but feel like it was the right decision.  I had this crazy dream last night about Dave Ramsey shaking his head at me and saying “When will you learn?” and then right after that the roof was blown off our house.  For those of you who are familiar with Dave Ramsey, he teaches about this thing called ‘Murphy’s Law’ and buying a car that we can’t afford is like asking ‘Murphy’ to move into our spare bedroom.  You see, the only way we could’ve purchased that car with CASH was to take the $10,000 we had saved for it and then dip into our Emergency Fund for the rest.  I don’t care who you ask, buying this car is not an emergency.  Both of us feared that if we did take money from our Emergency Fund that a real emergency would take place and we wouldn’t be able to pay for it because we just bought a new car with the emergency money.  We also had the option of taking out a small loan to pay for the extra, but by the time we paid off the interest this car that was such a ‘great deal’, was not as good of deal anymore.

I’m sad that we missed out on this car and am hoping that when the time is right, we will find another great deal.  BUT, I’m still bummed and hate having to make ‘adult’ decisions.

So, do you drive a Dave Ramsey-mobile?  I’d love to see a photo of it!  You can upload a photo of it on my Katrina’s World Facebook Page  - just tag #DaveRamseyMobile and tell me all about it!

I’d also love to know what you would do in our situation?!  Tell me all about it – whether you agree or not!

GreenCar

Share this post:
facebooktwitterpinterest
August 25, 20160 commentsRead More
How To Make Homemade Chalk

How To Make Homemade Chalk

ChalkThe summer was amazing and I’m totally honest when I say this – not long enough!  I love to have my kids at home with me – YES, they drive me absolutely crazy, but I love to have them around – all three of them.  We had many days this summer that we needed to escape the heat and be indoors and when we found ourselves bored, we’d either start baking or crafting!

About 7 years ago, my older son and I tried to make homemade chalk and let’s just say, it’s didn’t go so well.  It involved a little bit of food coloring, and toilet paper rolls and by the time they dried 5 days later, we never could get them out of the toilet paper rolls!  Don’t ask…it was a bad idea.  :)  So, it was time to try again!

I did some looking around on Pinterest and found a great post by Princess Pinky Girl all about how to make your own sidewalk chalk.  We followed this recipe pretty closely, but I’ll be honest, I didn’t really measure everything and we used a lot more of the paint – I mean, who doesn’t want super bright colors?  I’m so glad I did – because our colors are very bright and we love using these!  I did learn a few things along the way that might make it easier and we had to let our dry a lot longer than just 24 hours.  Thank you to Princess Pinky Girl for your great post and ideas!  Below is my recipe and what we actually did that worked well for us.

Homemade Chalk Recipe

Gather these items:

  • Plaster of Paris Dry Powder (I actually found a huge tub of this at a garage sale for super cheap – been saving it for awhile now – you can get at any craft store).
  • Tempura Paint (I got 7 bright colors and got big sizes – 24oz bottles.  In fact, another great sale was going on at my local Hobby Lobby – I paid only $1 for each bottle).
  • Silicon molds or candy melt molds (I had a silicon Pampered Chef cupcake flower mold that worked great, and I found a big stack of candy melt molds at a garage sale for less than dollar – these worked really well).
  • Over-sized Disposable Cups
  • Plastic Spoons
  • Water

Homemade Chalk Recipe:

  • We mixed up each color in it’s own disposable cup.  I started out with only 3 colors to begin with because I have 3 kids and I wanted them each to have their own color to mix up.  The amount of colors you can make with this recipe will depend on how many molds you have on hand.
  • Fill each up with about 3/4 cup of water.
  • Add about 1/2 cup of paint to the water and mix well.  The original recipe says about 1/4 cup of paint, but I really liked the super bright colors that we achieved with 1/2 cup of paint.
  • Next, add 1 cup of the dry plaster of paris powder and start mixing with your plastic spoon.  Make sure to mix really well. I did learn that if you don’t get it all completely mixed up you will have pockets of the white plaster of paris in your dry chalk that never was mixed with the paint.  Not a big deal, but a bummer when you are coloring something very specifically and it turns white on you.  Double check after your kid’s arms tire out and make sure there are no lumps.
  • Pour into molds and then very gently pound the mold on the counter to pop any air pockets or bubbles and to completely flatten.
  • You can layer different colors in the molds, just don’t mix them up.  It does dry really with really cool swirls in it!
  • Let them dry for at least 3 full days before you try to take them out of the molds.  They will pop right out of a mold when they are completely dry.  If you try to pop them out too early, they actually crumble and that’s a bummer (Yes, this happened a few times to us).  The candy molds dried much faster than the cupcake molds.  If you can set them to dry outside in full sunlight, they may dry much faster.  You can tell when they are NOT dry by the color change they have – the outside edges will dry lighter in color and if the inside is still well, it will look darker and like it has a wet spot on it.  My candy molds dried in about 3 days and I did eventually turn them upside down so that the bottom would dry as well – a few actually fell out once they were dry.  My flower regular sized cupcake molds took about 6 full days to dry all the way and at about 4 days, I was able to pop them out and I set them outside in the full sun to dry all the way, which took another 2 days.

The colors are awesome, bright, and so fun to use!  My kids love this chalk and we have a great time using it!  I love this chalk because the colors are so fun!  I can’t wait to make this recipe again and am now on the hunt for more fun candy molds at garage sales.  I would totally recommend making this chalk with your kids – it’s really a fun, easy, and pretty quick craft!  I’m hoping to make some as gifts to give the cousins for Christmas!

Let me know if you try this recipe out!  Happy coloring!

Chalk

Share this post:
facebooktwitterpinterest
August 16, 20160 commentsRead More
How To Make Dehydrated Apples

How To Make Dehydrated Apples

HowToMakeDehydratedApplesYes, I know it’s summer, but my house smells like Fall!  What’s better in fall you say?  Apple Pie!  Yes!  My house smells like Apple Pie and here’s why – I’m dehydrating a bunch of apples today!  Yummy!!  A neighbor came over and when I opened the door she told me my house smelled amazing and she wondered what candle I had burning!  I told her I didn’t have a candle lit, but was making dehydrated apples – she was impressed!

I’m not kidding, it really smells awesome and I can’t wait to make them this fall!  They are so easy too – and I think they are even easier than the dehydrated bananas.  I sort of feel like I’m a pro now at this (ya know, because I have dehydrated one batch of bananas and one batch of apples – :) – yep just pass me my pro status ribbon right now!) – so I have a few extra tips on how to make dehydrated apples quick and easy.

For starters, my dehydrator only has 4 trays – so I can’t do a lot at the same time, but I did realize you can prep a whole bunch at once and save half the batch for later.  If you have fewer trays like I do, then peel/slice/core your apples and place all the extra apples in a big bowl filled with a bit of water and lemon juice.  Cover and store in your refrigerator until you are ready to dehydrate.  I did one batch during the day (about 8 medium to large sized apples), and then cooked the second batch overnight.  This totally happened by accident, I really had no idea how many apples my trays would fit so I ended up buying a 5 bags of 3 apples each on clearance at the grocery store and prepped all of them at once.  :) Silly me!  But I was happy to prep and save all the extras.  It worked out great!

One other tip, if you plan to do this a lot, then make sure you get an Apple Peeler/Slicer/Corer machine – I know Pampered Chef sells one, so does Williams and Sonoma (which is the brand I have – I’m lucky though, I found mine at Goodwill for $5).  I tend to use mine a lot and it makes the whole process so much faster and super fun for your kids to help with!  It’s messy and sticky, but a lot of fun!

How To Make Dehydrated Apples

You will need:

  • Food dehydrator
  • Small spray bottle
  • 15 medium size apples
  • Juice from one lemon or 2 Tbs of bottled lemon juice
  • Cinnamon
  • PAM or Misto filled with Olive Oil
  1. Peel, core, and slice the apples the same thickness so they dry evenly – 1/4″ is perfect.  I used an Apple Peeler/Slicer/Corer.  I picked mine up at Goodwill for $5 and I LOVE it!  Makes peeling super fast and my kids love to help with it.  Also, apples are sliced the same thickness which is helpful for drying.  If you don’t have a Peeler/Slicer/Corer, you can do it manually.
  2. Lightly srapy your dehydrator trays with olive oil or PAM to help with sticking.
  3. Place apples in single layer on dehydrator trays.
  4. Spray apples with lemon juice from your small spray bottle to keep the apples from turning a yucky brown color.
  5. Lightly sprinkle cinnamon on the apples.
  6. Turn on the dehydrator and set to 135 degrees.
  7. Check apples in 5 hours and consider flipping over (again depends on the design of your dehydrator).
  8. Cook for a total of 10 hours until apples are no longer mushy to the touch.
  9. Store in an air-tight bag or container.

Trust me, you will love how these make your house smell!! Yummy!  Making these apples yourself is super healthy and such a great way to help stretch your grocery budget!  My kids LOVE them and they are a super healthy snack for school!  Win win!

If you try them, let me know what you think!

HowToMakeDehydratedApples


Share this post:
facebooktwitterpinterest
August 2, 20160 commentsRead More
How To Make Dehydrated Bananas

How To Make Dehydrated Bananas

HowToMakeDehydratedBananasHi everyone!! It’s been awhile – and for that I’m sorry!  I’ve been so busy this summer enjoying every last second with my kids that I’ve made a conscience effort to step back from my blog.  It’s been a breath of fresh air actually – just taking a break.  I’ve really needed the time to think and just listen to the Lord speak into my life.

My summer has been great!  I hope yours has been too!  We’ve enjoyed tons of time with our family and friends, doing fun crafts – like making homemade chalk (I’ll discuss this in a later post – it was AWESOME!), spending much-needed time with cousins, lots of runs through the neighborhood and of course, tons of swimming!  My adorable neighbor across the street blessed with me with a hand-me-down food dehydrator and I’m trying it out today!  Which is what this post is really about actually – so Katrina, stop rambling all about ‘what you did this summer’….seriously!

We were at the grocery store this morning and there was an awesome deal on ripe bananas – as well as a of bags of discount apples.  All a sudden I remembered that my neighbor said I could have her old dehydrator and viola!  We purchased  about 3lbs of bananas and a couple pounds of apples and as soon as we got home we started prepping the bananas for the dehydrator.  I had the bright idea that I should spray the apples with lemon juice using a small water bottle instead of hand-dipping each one – just seemed a lot faster, and on a day like today, when I still have to find a place for a ton of cereal that I bought with some HOT coupons for super cheap this morning, I don’t have time to waste!  Plus, my daughter has a friend coming over soon and my oldest has a baseball game in a few hours!  I’m happy to report that it took less than 3o minutes to slice, arrange, and spray about 3lbs of bananas.  My dehydrator only has 4 trays, and I filled them all up, so I’ll have to wait until tomorrow to process the apples.  I’m super excited for how quick and easy this process was!  I set the temperature to 135 degrees and I guess they should be done in about 10 hours.

This is a great way to use up those over-ripe bananas that your kids think are too mushy to eat!  We tend to have a lot of those each week – seems like I never know what fruit my kids will want to eat and the poor bananas get ripe so fast!  The ripe ones will taste a lot sweeter too!  I plan to try blueberries soon and of course the apples!  So excited!  I love new ideas like this and also love finding frugal and fun ways to stretch every dollar – especially with our food budget!

How To Make Dehydrated Bananas

You will need:

  • 3-5lbs of ripe bananas (depends on who big your dehydrator is)
  • Food dehydrator
  • Small spray bottle
  • Juice from one lemon or 2 Tbs of bottled lemon juice
  1. Peel and slice the bananas the same thickness so they dry evenly – 1/4″ is perfect
  2. Place bananas in single layer on dehydrator trays
  3. Spray bananas with lemon juice
  4. Turn on the dehydrator and set to 135 degrees
  5. Check bananas in 5 hours and consider flipping over (again depends on the design of your dehydrator)
  6. Cook for a total of 10 hours until bananas are no longer mushy to the touch.
  7. Store in an air-tight bag or container.

Easy, fun, frugal, and so yummy!  Enjoy!

HowToMakeDehydratedBananas

Share this post:
facebooktwitterpinterest
July 29, 20160 commentsRead More
How To Get Stained Crayon Out Of Your Clothes

How To Get Stained Crayon Out Of Your Clothes

CrayonOhmygosh!  I was frantic – I cried, I screamed, I even yelled at myself and my kids and even my dog who just so happened to be standing in the laundry room as I removed item after item out of my dryer covered in dark blue crayon.  Not just any items, all of my daughters favorite pink shorts and my favorite workout clothes, and these days, I tend to not only workout in those clothes, but live in them daily.  After a few really long screams and a couple deep breaths I grabbed a huge handful of those totally stained clothes and ran upstairs to almost sleeping kids and showed them the effects of what crayon does to your clothes…I yelled some more and then I left them to go to sleep.  Not the best way to end the day, but gosh was I angry.

You see, only about a week ago a chapstick tube missed my pre-wash inspection of all pockets and was washed and then dried with an entire load of my husbands work clothes.  I spent the better part of a morning trying to get oil stains out of all his clothes.  Then today, to have the crayon incident was enough to totally set me off!!!   How I’ve managed to make it 10 years without ever having the “crayon incident” happen is a miracle, but I’m still super upset about it.  While I screamed, my adorable husband got online and found a great post about what we could try from Diary of a Doctor’s Wife Blog.  If this ever happens to you - Try This!

I’ve tried this, washed the clothes and am totally terrified to see how they turned out.  I’ll let you know!

Honestly, I’m still trying to calm down.  Pray for me!  :)


UPDATE:  I’ve tried exactly what this post says to do, and after running my clothes through the cycle two times, they look a lot better than they did originally.  The crayon did not come out completely on all the different fabrics that I had in the load.   Thankfully, most of my favorite athletic clothes are basically stain-free.  A couple items were made of a sweatshirt-type textured material and those one are just holding onto the crayon stain.  Sadly, my daughter’s favorite cheerleading light pink shorts are the worst ones in the bunch, the blue stains have faded, but they are still very much a stain and she’s heartbroken over those shorts (these are made of the sweatshirt type material).  We did lose one of my husband’s work shirts, but it was on it’s last leg before the crayon incident.  I did learn that having a front loading washer makes soaking in really hot water very hard.  After I washed my whole load once, I then re-soaked the entire load in my kitchen sink and poured boiling water over it.  I let it soak for a good 3o minutes before I ran the whole load through the washer again.

In hindsight, I would soak in boiling hot water right away and I would probably soak and drain and then re-soak again and then throw directly into the washer and wash on the hottest wash my machine would allow.  The pre-soak is key, and pre-soaking in super hot water.  I did use a Magic Eraser on my dryer drum and that really helped get rid of the blue ring on everything.  All in all, it was not a fun thing to have happen and I’m praying that it doesn’t happen again.  But, if it does happen to you, try the above post and you will probably save some of your load!

Crayon

Share this post:
facebooktwitterpinterest
June 27, 20160 commentsRead More
Quotes by Katrina #4

Quotes by Katrina #4

It’s hard to remember this when you are deep into relationships with people around you.  Sometimes you don’t realize just how much people around you influence you, but it’s so true that negative people have a problem with every solution.  Make sure you stay aware of the people you surround yourself with.  Keep pursuing your dreams! Quote_StayAwayFromNegPeople

Share this post:
facebooktwitterpinterest
June 18, 20160 commentsRead More