View Sidebar

Archive for category: Money Savings Ideas

Top 20 Christmas Break Activites to do on a Budget With Your Family

Top 20 Christmas Break Activites to do on a Budget With Your Family

ChristmasActivONBudgetThis post contains affiliate links.  As an Amazon Associate I earn from qualifying purchases.

It’s almost Christmas!  Yeah!  I look forward to the break that my kids get from school more than anything!  I love having them home…I really do!  Trust me, I have my days when I want to pull my hair out because they are home, but for the most part, I love to hang out with them.  Yesterday, I was sitting down to my computer to make a list (yes, confession time, I’m a HUGE list maker – anyone else out there make a cazillion lists just so you can cross stuff off them?!) of all the fun things we were going to do over Christmas Break.  Or should I say, a list of all the things I’m hoping we get to do over Christmas Break.  This year, my husband is going to take a week off – and we don’t plan to go anywhere – it will be a sort of “stay-cation” and I’m super excited!  We all know Christmas can be expensive enough, so we plan to do a lot of fun things, that make lasting memories, that don’t cost very much – which you all know is how we roll around here.  There are all sorts of fun things you can do that don’t cost much and I plan to have a blast doing them (and hopefully my family will too)!  Grab a pencil and make a list!  Here is my Top 20 List of Fun Christmas Break Activities To Do On A Budget With Your Family:


  1. Make a Dollar Store Ornament:  I found clear plastic bulbs at my local Dollar Store and we plan to make these cute Time Capsule ornaments that I found on Pinterest.  If you can’t find any clear plastic bulbs at your local Dollar Store – try these instead.
  2. Gingerbread House Competition: Every year we have a Gingerbread House competition – usually boys vs. girls and we set a time limit and use these store bought gingerbread house kits and get crafting!  If you love to bake, you can make your own gingerbread ahead of time like this recipe from tikkido.com to use, or do what I do, buy the kits the day after Christmas and use them the following year!  The kits are everywhere after Christmas and are usually 70-80% off!  I always pick up a few and pack them away with our Christmas decor to use the following year!
  3. Play a Family Board Game: One of our family favorites is Headbandz!  We giggle and laugh like crazy when we play this silly game – especially at our youngest son who loves to cheat!  Actually, he loves to win at all costs so he tries to find creative ways to cheat!  Silly kid!  I picked up my copy of Headbandz on VarageSale for only $2!  You can also check your local Goodwill, or Thrift Store and even a kids second-hand thrift store.  Or you can buy Headbandz now!
  4. After Christmas Clearance Sales: Our family loves to hunt for good deals the day after Christmas!  While this may not sound like a family activity, it sure is in our house!  Or family gets very into decorating our house with Christmas Lights!  We all love to help and we have a tradition of going shopping for clearance deals on lights and decor the day after Christmas!  All three of our kids think it’s an adventure to find the best deals on decor for the yard and we spend a good portion of the day after Christmas out hunting for deals!  Of course, we usually go out for lunch too!
  5. Go to a Cheap Holiday Movie:  Our local movie theater shows early movies before noon on Saturday mornings for only $5!  When you are taking a family of 5 to see a movie this is a doable deal every once and while!  There always seems to be a good holiday movie that comes out around Christmas time and so this is a cheaper, fun thing to do, especially if your kids don’t get to go to the movies very often.  I have a movie gift card that I was given last Christmas that we still have not used, so we plan to use that and with the money we save we might spring for popcorn!  Of course we will get the BIG one and share it, and our theater gives free refills on the BIG popcorn!  Score!
  6. Go Out to Eat:  Find some local restaurants that have Kids Eat Free or Kids Eat for $1.99 and have a special meal out!  One of my local favorites is Newks and right now they are offering Kids Eat for $1.99!  Not too bad for a meal out!
  7. Play Snow Soccer:  We recently did this in Montana over Thanksgiving when we were visiting family.  Our family LOVES soccer and what better way to play it than on a field of snow?!  Sounds crazy, well, it was a blast!  We had a decent snowfall, and we cleared off some of the snow on a much smaller field, but left enough snow to run across it and kick a soccer ball.  We set up 2 pop-up soccer goals and put on all our snow gear and played a soccer game!  It was so much fun!
  8. Have a Snowball Fight:  If you have snow, then have a snowball fight!  Use these tools to help you make snowballs or just go ‘old school’ and make them yourself.  I’m praying for some snow here in Colorado, but it’s almost Christmas and we have had 60 degree weather all week.
  9. Go Sledding:  We love to go sledding in our neighborhood and have recently found a great hill not far from our house that is perfect for sledding!  I found all our sleds at garage sales and am thankful, because we seem to go through a lot of them!  If you need some sleds, you can buy them here.  Call some neighbors to join you in the fun!
  10. Go Look at Christmas Lights:  Looking at Christmas lights has to be one of my absolute favorite Christmas traditions!  I love it so much that I make our family go look at lights on Christmas night!  Thankfully, my family loves this activity about as much as I do and will go look at light multiple nights in a row!  Living in a big city helps as well, there are so many lights to go see!  We usually start in our town and work our way out from there!  We have been doing this for so many years now that we have some of our favorite houses that put up lights every year that we go see and then we love finding new ones!   We don’t just jump in the car and start driving around, we ALWAYS splurge and stop at McDonalds (which is right around the corner from our house) and get $1 drinks to sip along the way!  You can always make your own hot cocoa and take it along with you.  My kids love to put their PJs on as well!  I’ve also learned that if I want this activity to last awhile, I need to bring snacks too!  I usually get a BIG bag of Smartfoods Popcorn to take along and that seems to keep everyone happy for quite some time!
  11. Christmas Color-By-Number:  Even though my kids are getting a bit older, they still love a good Christmas craft and I stumbled upon some Color-By-Number sheets that I could just print off from Pinterest.  I’ve been surprised how long they sat their together and colored the sheets.  There are lots of them online and on Pinterest and this makes for a frugal activity you can do with your whole family!  These are the ones I found on Pinterest.
  12. Bake Cookies:  Get the whole family together and spend some time baking!  I realize this may not be fun for some people, but goodness, in our family we all love to bake! I have a ton of great recipes on my KatrinasWorld Pinterest page you can check out!  A few of my favorite Christmas cookie recipes are: Peppermint Meltaways from CookingClassy.com and  Cherry Chocolate Kisses from CurvyCarrot.com.  We make both of these every Christmas and then hand them out to all our neighbors!
  13. Watch The Grinch: Rent from your local library or buy, How the Grinch Stole Christmas and bake these Grinch cookies from inKatrinasKitchen.com!  Then, you must also make Grinch Punch and sit down and watch the movie and eat your yummy treats! It’s a silly tradition, but one that our family does every year and we just love it!  It’s a great night-time activity to do and is so much fun!
  14. Home Alone + Breakfast:  This activity may sound silly, but somehow it’s grown to be one of our family favorites.   Have friends over for breakfast and watch the original Home Alone movie – or have breakfast for dinner and watch the movie at night!  I’m not sure why we picked Home Alone, but it’s a classic that our family loves to watch, plus we have dear friends that we’ve made this a tradition to do every Christmas break and it’s something I look forward to each year!  This year we are planning to have our friends come over for dinner instead of breakfast, but we still plan to eat breakfast for dinner!
  15. Read the Christmas Story:  On Christmas Eve, act out the Christmas Story directly from the Bible – you can find it in Luke 2:1-20.  If you have young kids, have them dress up and act out the parts as you read.  We have done this since I was a little girl and I even have a rocking horse that is perfect for the Donkey that Mary rides on!
  16. Birthday Party for Jesus:  On Christmas Eve we throw a birthday party for Jesus!  After we read and act out the Christmas story from the Bible (this can be found in Luke 2:1-20), we have birthday cake and celebrate Jesus’ birth!  Get creative with your kids and have them help you make the birthday cake earlier in the day – it can look like whatever you want!  We even put candles on our cake and sing Him “Happy Birthday!”
  17. Friends + Chili + Board Games:  Invite a family over to share chili and cornbread and play board games.  We have a couple favorite family board games right now, Qwirkle and Wits and Wagers!  Both are great family-friendly games!  Wits and Wagers is so much fun for a larger group and even younger kids can play along!
  18. Volunteer:  Volunteer your time as a family helping at your church for all the extra Christmas Eve services they will be having.  Our family helps out in the Children’s department with the 4year olds so the adults can attend the Christmas Eve Candlelight service.  If watching kids is not your thing, I’m sure there are lots of other things your family can help out with, like: serving coffee and cookies, greeting at the door, handing out bulletins, cleaning, helping set up extra chairs, etc.
  19. Go Look at Lights Again:  In my area our local newspaper puts out a list of addresses of the best Christmas lights to see all over our city – look up the addresses and go see some more lights!  We also have a lot of local Facebook groups in my area that keep a running list of great places to see lights.  Don’t forget to stop and get drinks along the way!
  20. Go Caroling:  This is completely FREE!  Gather some friends together and go sing Christmas carols to your neighbors!  I’m horrible at singing, but goodness, how fun is this to do?!   I know in my neighborhood, it would shock my neighbors to have me ring the doorbell and then start singing!  We’ve never done this before as a family, but we just might give it a try this year!

This post contains affiliate links.  As an Amazon Associate I earn from qualifying purchases.

ChristmasActivONBudget

Share this post:
facebooktwitterpinterest
December 19, 20180 commentsRead More
CLEAN MOM – Homemade All-Purpose Cleaner

CLEAN MOM – Homemade All-Purpose Cleaner

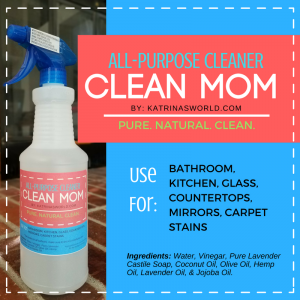
CleanMOM_KWYou all know me, I love to make things at home that I can make cheaper than buying at the store.  A few weeks ago I shared with you all my recipe for Homemade All-Purpose Cleaner that I like to use at home – it’s cheap to make, easy to make and has NO harsh chemicals!  The best thing about this cleaner is that it smells great and is super easy to make with things around your house!  I know our lives get super busy, I mean seriously, we are moms – so I’ve decided to bottle my cleaner and sell it in case you are too busy to make it yourself!  :) Yep, you got it – I now offer my Homemade Cleaner to any Parker, Colorado locals.  If you would like to buy a bottle of my CLEAN MOM All-Purpose Cleaner – please email me.

CLEAN MOM All-Purpose Cleaner is pure, natural, and cleans better than anything you can get at the store – without the harsh chemicals!

It works awesome on mirrors and glass leaving a streak free shine! Use also in your kitchen, bathroom, countertops and even on carpet stains!

*Ingredients: Water, Vinegar, Pure Lavender Castile Soap, Coconut Oil, Olive Oil, Hemp Oil, Lavender Oil and Jojoba Oil.

$3/bottle (28oz) or $10/4 bottles
Pickup in Parker, CO.  I accept Cash, or PayPal.

Order NOW!

Share this post:
facebooktwitterpinterest
February 14, 20180 commentsRead More
#1 Homemade All-Purpose Cleaner

#1 Homemade All-Purpose Cleaner

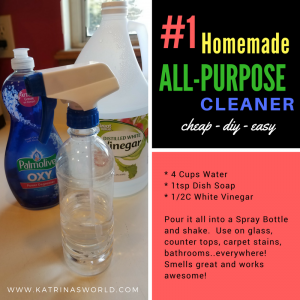
BestAllPurposeCleanerMy favorite scent is Clean.  I’m serious, I love the smell of Clean.  No real scent needed, just Clean.  For me, that’s the smell of vinegar and a little water!  :) I’ve made this amazing Homemade All-Purpose Cleaner for years and never thought to share it until now.  It’s super simple, cheap, easy and you can vary it a little bit if you want.  All you need is a spray bottle – either go buy a new one, or save one of your old Windex cleaner spray bottles – I promise you will love this cleaner so much better than anything you can buy at the store for double the price!  Get your spray bottle and mix:

  • 4 Cups Water
  • 1/2 Cup White Vinegar
  • 1tsp (I like Palmolive or Dawn, or 100% Pure Castile Soap)
  • Squeeze of Lemon Or Couple Drops Lemon Essential Oil (Optional)

Shake and viola!  It smells great and works so much better on glass and mirrors than anything else you can buy!  I don’t always add lemon, but you can if you want to make it smell even better.

USE FOR:

  • Kitchen Counters
  • Glass
  • Mirrors
  • Bathroom Sinks, Counters, Toliets
  • Carpet Stains
  • Tile Floors

It’s awesome, cheap, easy, and smells so Clean!

**UPDATE – I now offer Katrina’s World readers the option to buy a bottle of CLEAN MOM All-Purpose Cleaner directly from me!  Click Here to find out more!

BestAllPurposeCleaner


Share this post:
facebooktwitterpinterest
December 4, 20170 commentsRead More
How To Throw A Hot Wheels Birthday Party

How To Throw A Hot Wheels Birthday Party

HotWheelsThemedPartyMy youngest son, Rylyn, just turned 5!  We had such a fun birthday party for him – you see, Rylyn used to love trains more than anything – but as the years have gone by, his love for trains has turned into a love for all things cars, especially Hot Wheels tracks and cars.  He loves them!  When we started to think about themes for his birthday party, we knew we had to do a Hot Wheels themed party.  If you have been reading my blog for a while, then you know that I love to plan birthday parties for my kids and I love to plan over-the-top fun parties on a serious budget – in my mind, there is no other way to do it!  I think if you work at it, you can absolutely have an amazing birthday party for your child without spending a lot of money – and, you can do it from home (which saves even more money)!


I wanted to make this party for Rylyn extra special because it’s the first “friend” party he’s had!  I know what you are thinking, Katrina, he’s 5, why in the world is this his first real party?  Well, I’ll be real honest with you, take a seat…. I’m a mom of 3 kids, and he’s the 3rd kid.  Simple as that – plus I’m smarter now.  :)  I didn’t want to start off this awesome birthday party tradition with Rylyn too soon, because I have many years ahead of fun parties with him.   He’s a crazy boy with so much energy, that I honestly wanted to put off the “friend” parties with him for as long as I could.


This was the first year that he finally noticed the fun parties that my other kids had and was already planning his own party.  When I think back on it now, I can’t believe that my oldest son, who turned 10 this year, has had 10 amazing at-home birthday parties.  His parties have been over-the-top!   He’s had really fun themes like: Messy Party, Star Wars, Science Lab, Minute-To-Win-It, etc.  My daughter, who turned 7 this year, has had a few less than my son (you see, I was starting to wise-up).  Her fun at-home parties started when she was 3 with her first “friend” party.  She’s had 4 great years of fun parties with themes like: Tea Party, Italian Cooking Party, Cheerleader Party, Daddy-Daughter Construction Building Party, etc.  Now that we are on to my 3rd, I’m older and wiser and think it’s ok that he’s just starting his “friend” party tradition.


When I’m planning a birthday party I start out by making a quick Word doc with all my ideas of themes that they might like.  I then make a guest list and ask for input from my child on who they would like to invite.  We go over the themes and I let them pick one.  Thankfully this year I pretty much knew what theme he was going to pick, it was either going to be Trains or Hot Wheels.  He chose Hot Wheels and I was off the races to start coming up with games and things to do for a November Hot Wheels party indoors with a bunch of 5 year olds.  What in the world can you do inside with car track? I did what any mom would do, I got on Pinterest to see what everyone else has done.  I found a lot of great pins for decorations for a “car-themed” party, but I know my son, and he could care less about the décor, he’s all about the fun things you would DO at the party.  He’s a very active boy and so are his friends, I knew I needed to keep them very busy or I’d lose control of them all.  I really didn’t find very many ideas at all of fun Hot Wheels themed activities we could do and was bummed.


It was close to Halloween and I still didn’t know what we were going to do at this party, but I had the invites made, the décor picked out and a cake ordered (from my mom of course).  A local high school in our area was hosting a Halloween Party for little kids, so we got ours all dressed up and headed over there for the free candy!  Once inside they had transformed the whole school into a Candy Land themed Halloween Party with tons of carnival games and it struck me, we could do that for Rylyn’s party!  Carnival type games that are Hot Wheels themed!  Genius!  My older son even mentioned to me much later that we should do a bunch of those simple games for Rylyn’s birthday party because Rylyn had so much fun and so did all the kids his age!  He even offered to help me make the games, and viola, we were off and running.  I was pumped because they all were fairly simple and inexpensive to put together, and they would work as indoor or outdoor games if the weather was nice enough (which at the time I had no idea what the November weather in Colorado would be like).  We got super lucky and had very warm weather the day of his party and could do most of the games outside, but I’m getting ahead of myself.


Here are all the game stations we came up with:


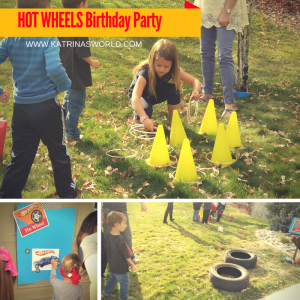
  • “Tire Toss” – We set up some old tires which I just so happened to as we had just put new tires on one of our vehicles.  YouHotWheels6 could also use ring shaped floaties used for the pool for kids who can’t swim yet.  You just set up the tires staggered and use beanie bags to toss into the tires.  If they make it into a tire, then they win a prize.
  • “Ring Toss” – We used glow necklaces hooked together to make a ring and had the kids toss them on to yellow caution cones that I happened to have for coaching soccer.  I found both at the dollar store.  The children had to take a “tire” glow necklace and toss it onto the cone.  If they made it, they won a prize.
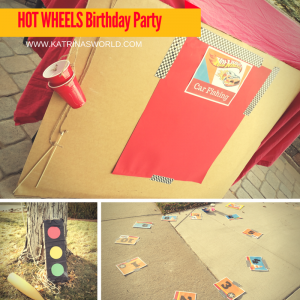
  • •“Pin Wheel”– Think of Pin the Tail On The Donkey, same idea but I made a big poster board of a Hot Wheels Car instead.  Then I printed and cut out a page of small tires.  At this station, I had my dear friend give each child a tire with some tape on the back and after they spun the child around a few times, blindfolded, they got to try to get their tire on the Hot Wheels Car.  We gave everyone candy for just trying this one no matter where their tire ended up.  I hung this poster on my garage and it worked out great.
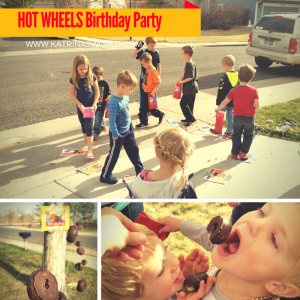
  • “Car Walk” – Just think of a good old fashioned Cake Walk!  Same thing, except if your number is called you win candy instead of a yummy baked good.  J I made numbers 1-10 and taped them to my driveway for the kids to walk on.  We played music and when we stopped the music you had to be on a number.  You would then pick a number out of a jar and whatever number was called won a piece of candy.  My daughter helped with this station and loved every second of it.  Hands down, this was the wall time favorite station by all the kids at the party.  I mean, who doesn’t love a good ‘ole cake walk?!HotWheels5
  • “Tire Eating Contest” – This was so fun!!! We hung mini chocolate donuts, which were the “tires” with fishing line from a low branch on our big tree in our front yard all at different lengths.  We then lined all the kids up in front of a donut that hung basically right in their face.  At the same time, with their hands behind their backs, they had to eat the donuts without touching them.  HILARIOUS to watch and so yummy!  The kids loved this one as well.  We only did this station one time as a group.
  • “Car Race”  – this was the last activity.  My older son built a Hot Wheels track that went down our stairs and made the cars go really fast!  We had everyone use the Hot Wheels car they were given from the “Car Fishing” game to face off with each other and see which car was faster.  I initially planned to make a big tournament poster with individual heats for the cars to race, but time got away from me and I realized that being 5 year olds, they didn’t really care who won!  They just wanted to race!
  • “Stop Light Piñata” – I made a VERY simple piñata from a tall rectangular Amazon box and stuffed the candy in the bottom of the box.  Taped it together and then decorated the box by wrapping black streamer paper all around the box completely covering it.  Then I cut out a red, yellow, and green circle from construction paper and taped them on the front of the box and it looked just like a stop light.  We hung the piñata from our front tree and used a very hard baseball bat toHotWheels4 whack it.  I was worried it might have a hard time busting open because it was a real cardboard box, but thankfully, that also meant that each child got to hit the box a few times and then we let the birthday box pound on it until it all feel apart – which he loved.  Was a very cheap way to make an adorable piñata.  This was another all group activity that we did only one time.
  • •“Car Fishing” – This one is where you hold a fishing pole with a string hooked to it, then the child tosses it over a big board and the person behind the board hooks a toy to the string and tosses it back like the child “caught” a fish!  We changed it up a bit and attached a red Solo cup to the end of a string on a wooden pole I had.  When they child tossed it over they were given a brand-new Hot Wheels car in their cup! They all seemed to love this and the best part was that the Hot Wheels cars are usually on $1!  We then planned to have each child keep that Hot Wheels car and use it for the Car Race that would happen later.


Other Things I Made:

The Decorations:

HotWheels3If you have read my posts from my other parties, you know I like to keep things cute, but simple and budget-friendly!  Rather than buying official Hot Wheels branded décor, I believe in picking solid colors that match and making my own birthday banners out of poster board and ribbon, and making my own signs and hanging them up.  Plus, we always use matching streamers.  I also made a simple tablecloth for the main table to look like a road.  I picked up a black plastic tablecloth from the Dollar Store as well as some white duct tape made my own road!  It was cute and cheap!  Don’t forget the balloons!  I always get about 10-15 solid color balloons and disperse them around the house – as well as outside so it sets the mood when you guests arrive!  Simple, cheap, and awesome!

Signs:

I made my own signs FREE from my favorite website – Canva, that I glued onto poster board and hung it up near each station.  I also recruited a few parents and family members, even my older kids, to run each station so that they could help the kids and hand out prizes.  My prizes consisted of a lot of candy (that I recycled from Halloween, and small little toys like pencils, erasers, stickers, that were again recycled from Halloween and that I picked up at the Dollar store).  I tried to find some fun Hot Wheels themed prizes, but when they got too pricey, I figured kids love candy and I had a TON from Halloween that was just a week before his party!

Goody Bags:

These were very necessary as the children needed a bag to carry around during the entire party so that they could put all the candyHotWheels2 and treats they won at each station – as well as when we did the piñata.  I kept these simple as well, I just picked up a package of red paper lunch bags that I found from my local Dollar Store and printed out a small tag that I made on Canva.com for each bag that I glued to the front and added each child’s name.  I had these sitting out so each child could grab their bag when they arrived to the party.

The Cake:

My mom is our cake maker extraordinaire!  She makes the cakes for my kids every year and they are  amazing!  The best part about her cakes is that they are gorgeous and usually make for an awesome focal point on the main table.  This year, she out-did herself with a Hot Wheels cake that had a tunnel right through the middle that you could drive a Hot Wheels car through (that was the request from the birthday boy)!   Even if you can’t make an extravagant cake, there are so many cute ideas on Pinterest for cakes, treats, and cupcake that go right along with the theme.  If I didn’t have my mom to make the cake, I was going to go with something simple – a “tire” donut cake!  Just take a bunch of small chocolate donuts and stack them up on a plate just like a bunch of tires. Then stick a candle on top and there you go – a “tire” cake!  Viola and super simple, plus this would be very inexpensive!

Invitations and Thank You Cards:

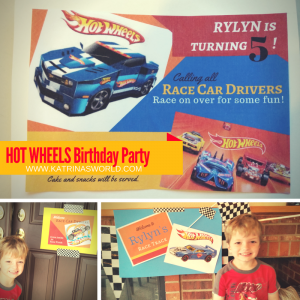
HotWheels7I also made my own invitations on Canva and used the same layout to make a thank you card.  I like to make invites that are simple 3.5 x 5 in postcards that are 1 sided that I can put in an envelope or pop right in the mail as a postcard.  It’s much faster to just make your own, print them out and mail, versus hunting down a matching invitation at the store and hand-writing in all the info (at least it is for me).  Plus, I love to make stuff on my own and personalize it!


It may sound like a lot of work, but besides making the signs and few other décor items, it really wasn’t that bad!  The party was a lot of fun and really you could use the same games to fit any theme for any party!  My son loved this 5th Hot Wheels birthday party and for me, that’s all that matters!


HotWheelsThemedParty


Share this post:
facebooktwitterpinterest
February 27, 20170 commentsRead More
Time to Tidy Up: Only Keep Stuff You Love

Time to Tidy Up: Only Keep Stuff You Love

OnlyKeepStuffYouLoveI’ve learned a lot this week, but the best thing so far – it’s ok to throw stuff away.  Really, it’s ok.  Even if that stuff is a gift from someone you love.  It may be a wonderful gift that had great intentions, but over the years, that gift sat on a shelf and collected dust.  It’s taken up a piece of real estate in your house and over the years you can’t seem to part with it since it was a gift.

You know what I’m talking about – that candle that you burned a few times and then you stuffed it in the very back of your kitchen cabinet because you got another one you liked better.  Or, it’s the quilt that someone made you as a wedding present.  While the quilt is lovely, it doesn’t match the decor of your house, or even of your guest room, so it’s been sitting in a box for 15 years.  Or, maybe it’s that collection of items from your favorite sports team – the mugs, light-up beer steins (and you don’t even drink beer), hats, coasters, posters, soda can cozies, tickets from games you have attended, and on and on – while you love this sports team, you may not love all the gifts you are given year after year with their logo plastered on it.

I know how you feel though – being stuck with a gift and feeling like you have to keep it just because you love the person who gave it to you.  In Marie Kondo’s book, The Life-Changing Magic of Tidying Up, she says, “Too many people live surrounded by things they don’t need ‘just because.’”  Most people have no idea how much space these things are taking up in their homes.

For me, I’ve seen this truth to be true – I can’t believe that in my already orderly (or so I thought) house I found 16 bags of things just taking up space that I didn’t want anymore, and I’m only just beginning.  The question to ask yourself when sorting through gifts is “Does this spark joy?”   Simple as that.  You have to remember that gifts are just things that are used to convey someone’s feelings for you – and after they have given you the gift, the gift’s purpose has been fulfilled.  Think about that.  It’s so true and my mind is blown.  This makes me think about gifts in a whole new light – both gifts I receive and gifts I give – honestly, it makes me want to try a lot harder when I’m giving a gift to someone.

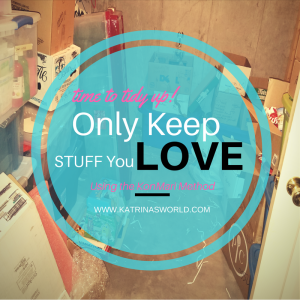
While some gifts are hard to part with, others are easy to discard.  You can part with that engraved china plate you got as a wedding gift that has sat in a box for your entire marriage.  Yes, it was a gift, but do you even remember who gave it to you?  This happened to me yesterday.  We tackled our storage room.  This room holds a giant pile of boxes that are old grade school papers, trophies from Awana, diplomas and awards from DECA and FBLA, Coca-Cola collections, M & M collections of everything you can dream of shaped, stuffed or imprinted with an M & M on it, wedding gifts, old cards and letters, etc.  It was intense.  I can’t believe how much we threw away!  We had so many empty boxes that we had saved and intended to use for shipping gifts to people.  Silliest thing ever, because we maybe ship 3-4 boxes a year!  We had enough boxes and shipping materials to ship boxes for the next 20 years or more!  Not only were these boxes taking up a ton of space, so were all the boxes of momentos.

We spent 5 hours working on this room and have made some great progress, but we still have a long way to go.  The funny thing, I noticed my attitude change over the course of the day.  I was super excited to get started on the room – I loved seeing all the things we were able to discard and haul to the trash.  Once we started unpacking my M & M collection and my box of unexpected photos from college, I started to get really stressed.  I didn’t know what to do with this stuff.  I panicked.  We kept going and I had to walk away for awhile.  I was getting totally overwhelmed.  There were boxes overflowing with packing peanuts,  piles of sorted item we were going to donate, and piles of discarded items.  Just walking from the storage room to the the stairs was like walking through a mine field.  We cleared a path and I set aside all my momentos to deal with at a later time.  The photos and special memory items are the items you sort through last.  Thank goodness, because I like to take photos of everything!

I unpacked boxes that have been packed since I moved into my house 10 years ago.  I had boxes of decor items that don’t match my current house and honestly I didn’t even remember I had them.  I found a really cool set of metal lamps that I really like, but have no problem selling instead of keeping.  In fact, I’m not only donating items, but finding a lot that I can sell on VarageSale.  I have listed over 100 items since I’ve begun my tidying journey and I’m loving the extra money that I’m making.

I’m super proud of my husband as well, he loves to collect stuff and tends to have multiple collections of things,  let’s see, there is the Coca-Cola collection, the Star Wars Lego collection, and the Broncos collection.  I tend to look at these things as ways to collect dust, which drives him crazy.  He thinks I’m boring because I don’t really collect anything.  Yep, we are a perfect match!  He did make some great decisions on things he was willing to part with and we have big plans for our storage room.  We are going to add some shelves and I’m so excited!  Our compromise, I have to find a place to display his Coke collection because he unpacked it all!  I still have to figure this one out.  :)

Needless to say, I survived the day, we still have a ton to do, but we made a huge dent in our stuff that I’m super proud and excited.  As I work through the whole house, I’m finding that I have a ton of storage totes and bins that I no longer need – as I’ve discarded most of the items that used to be in them.  I’m also loving reading Marie Kondo’s book because there are just times in your life when you just need someone to tell you it’s ok to throw stuff away.  I also feel relieved that you really only need to keep stuff that you truly love.  How is your tidying journey going?

OnlyKeepStuffYouLove

Share this post:
facebooktwitterpinterest
January 16, 20170 commentsRead More
Katrina’s Coupon Tip #14 – Call Your Cable Company

Katrina’s Coupon Tip #14 – Call Your Cable Company

CouponTip14_CallCableCoDid you know that you can save money each month on your cable bill by calling them?  It’s really as simple as that – promise!  You know how I feel, you sign up for the 2-year introductory price that is a smoking deal + they give you extra channels and then your husband loves you because they also give you all the NFL channels for FREE.  But there is a catch, this deal is only offered for the first 2 years and by then, you know you LOVE their service and all the amazing channels.  It’s like a punch to the gut when you get your first bill after this 2-year introductory period is over and the bill is tripled in price.  Ugggh!!  For a money-saving mom like me, I just couldn’t imagine paying full price for our cable bill.  It was either stick with our current cable company and hope for a discount or switch to another cable company and see what type of introductory deals they could offer us.

Between you and me, I love our current cable provider so I was hoping that we would not have to switch, but we didn’t want to keep paying the high prices.  My amazing husband decided to give our current provider a call and see if there was any way we could cut down on our bill – or he was going to end our contract and switch to someone else.  You know what?  Calling them was a great idea!  He saved us a ton of hassle of switching to a different company and having to deal with changing equipment, etc. by just asking for a discount.  Crazy huh?  He was able to negotiate a $63/month discount + new equipment upgrade – all from simply asking for a deal!  In fact, our cable company told him that we could call them every 3 months and ask for the current promotion to be applied to our account for future savings with them!  Woot!  Woot!  I’m super excited!

Remember, if you call your current provider, they may not be able to give you the same discount we received, but it doesn’t hurt to ask and shop around!  Just remember to be polite – no need for demanding a deal.  If they don’t give you the type of discount you want, then call another provider.  Being polite goes a long way in receiving special deals – keep in mind, the company needs to make money too, so don’t be unrealistic when asking for discounts.

CouponTip14_CallCableCo

Share this post:
facebooktwitterpinterest
November 29, 20160 commentsRead More
Why We Didn’t Take Out A Loan For A Car

Why We Didn’t Take Out A Loan For A Car

GreenCarBeing an adult is hard.  So hard.  Here is what happened yesterday – are you ready for this? Here goes:

We need a new car in a bad way.  Check this baby out - this is my Dave Ramsey-mobile.  It’s a 1993 Honda Del Sol convertible- lime green with lime green wheels too, it was a beauty when I got it 20 (gasp) years ago!  Who’s heard of Dave Ramsey?  Love him!  Consider him my uncle – for real.  Around our house we call him ‘Uncle Dave’.  Well, when we first got married someone gifted us with his Total Money Makeover class and our newly married lives were completely changed – in a good way.  We had $90,000 of debt when we got married and after taking his class we were able to pay off ALL of that debt in just over a year.  We got extra jobs, worked out butts off and lived on beans and rice.  Boy was I glad the day we payed the last debt off!  I was so proud of us.  Now, we are 14 years down the road, still living debt-free and we never fight about money – which his a huge plus!  BUT, we really need a new car – this lovely Dave Ramsey-mobile is on it’s last leg.  In fact, this was the first car I ever had – I was given this car when I turned 16 and that was a long time ago.  My poor husband drives it to work every day and has for years and years.  It’s reliable, paid for, and does the job, BUT, we are ready to move on to another vehicle that we can fit our kids in.  As you can see, this car is on a 2-seater, and that’s hard when you have 3 kids.  :)

My husband would like to get a truck.  I would too.  Who knew that trucks hold their value so well?!  Not us.  We know that now.  We have been saving for a few years, anything extra at the end of the month and we have managed to save $10,000 – which is not going to buy much of a truck – we’d need double that to get something that will last us a few years.  The little green car will need some work put into it this fall – and honestly, the repairs are not worth it if we plan to sell it.  Which means, we are in the market for a newer vehicle.  Although my husband would really like a truck, we have decided the ‘adult’ decision would be to get a car instead, as they are cheaper, and we can pass it to our son who will be driving (gasp) in 6 years (ohmygosh, I can’t believe he will be driving soon….ahhh!!!).

With new resolve, we began looking on Craigslist for a 4WD car with lower miles, and only a few years old.  Imagine my luck when not an hour earlier someone had posted a gorgeous sedan, a few years old, with only 30,000 miles on it – asking only $13,800, claiming he was a very motivated seller.  The blue book on this car was mid $14,000′s.  My bargain hunting ears were fully listening.  Just what I like to hear – someone who took really good care of his car and was motivated to sell and offering a deal.  Of course we had to go check it out.  We were the first people to call him and went to go look at it last night.  It was beautiful.  Really – just like his Craigslist post said.  We talked him down to $13,400 – even better deal.  Then we shook hands and said we needed to talk about it first and he said he would hold our place in line, but he did have a handful of others interested.  We talked about it the whole way home.  What would you have done?

It’s now the next day and we don’t have the car.  I’m super sad, but feel like it was the right decision.  I had this crazy dream last night about Dave Ramsey shaking his head at me and saying “When will you learn?” and then right after that the roof was blown off our house.  For those of you who are familiar with Dave Ramsey, he teaches about this thing called ‘Murphy’s Law’ and buying a car that we can’t afford is like asking ‘Murphy’ to move into our spare bedroom.  You see, the only way we could’ve purchased that car with CASH was to take the $10,000 we had saved for it and then dip into our Emergency Fund for the rest.  I don’t care who you ask, buying this car is not an emergency.  Both of us feared that if we did take money from our Emergency Fund that a real emergency would take place and we wouldn’t be able to pay for it because we just bought a new car with the emergency money.  We also had the option of taking out a small loan to pay for the extra, but by the time we paid off the interest this car that was such a ‘great deal’, was not as good of deal anymore.

I’m sad that we missed out on this car and am hoping that when the time is right, we will find another great deal.  BUT, I’m still bummed and hate having to make ‘adult’ decisions.

So, do you drive a Dave Ramsey-mobile?  I’d love to see a photo of it!  You can upload a photo of it on my Katrina’s World Facebook Page  - just tag #DaveRamseyMobile and tell me all about it!

I’d also love to know what you would do in our situation?!  Tell me all about it – whether you agree or not!

GreenCar

Share this post:
facebooktwitterpinterest
August 25, 20160 commentsRead More
How To Make Dehydrated Apples

How To Make Dehydrated Apples

HowToMakeDehydratedApplesYes, I know it’s summer, but my house smells like Fall!  What’s better in fall you say?  Apple Pie!  Yes!  My house smells like Apple Pie and here’s why – I’m dehydrating a bunch of apples today!  Yummy!!  A neighbor came over and when I opened the door she told me my house smelled amazing and she wondered what candle I had burning!  I told her I didn’t have a candle lit, but was making dehydrated apples – she was impressed!

I’m not kidding, it really smells awesome and I can’t wait to make them this fall!  They are so easy too – and I think they are even easier than the dehydrated bananas.  I sort of feel like I’m a pro now at this (ya know, because I have dehydrated one batch of bananas and one batch of apples – :) – yep just pass me my pro status ribbon right now!) – so I have a few extra tips on how to make dehydrated apples quick and easy.

For starters, my dehydrator only has 4 trays – so I can’t do a lot at the same time, but I did realize you can prep a whole bunch at once and save half the batch for later.  If you have fewer trays like I do, then peel/slice/core your apples and place all the extra apples in a big bowl filled with a bit of water and lemon juice.  Cover and store in your refrigerator until you are ready to dehydrate.  I did one batch during the day (about 8 medium to large sized apples), and then cooked the second batch overnight.  This totally happened by accident, I really had no idea how many apples my trays would fit so I ended up buying a 5 bags of 3 apples each on clearance at the grocery store and prepped all of them at once.  :) Silly me!  But I was happy to prep and save all the extras.  It worked out great!

One other tip, if you plan to do this a lot, then make sure you get an Apple Peeler/Slicer/Corer machine – I know Pampered Chef sells one, so does Williams and Sonoma (which is the brand I have – I’m lucky though, I found mine at Goodwill for $5).  I tend to use mine a lot and it makes the whole process so much faster and super fun for your kids to help with!  It’s messy and sticky, but a lot of fun!

How To Make Dehydrated Apples

You will need:

  • Food dehydrator
  • Small spray bottle
  • 15 medium size apples
  • Juice from one lemon or 2 Tbs of bottled lemon juice
  • Cinnamon
  • PAM or Misto filled with Olive Oil
  1. Peel, core, and slice the apples the same thickness so they dry evenly – 1/4″ is perfect.  I used an Apple Peeler/Slicer/Corer.  I picked mine up at Goodwill for $5 and I LOVE it!  Makes peeling super fast and my kids love to help with it.  Also, apples are sliced the same thickness which is helpful for drying.  If you don’t have a Peeler/Slicer/Corer, you can do it manually.
  2. Lightly srapy your dehydrator trays with olive oil or PAM to help with sticking.
  3. Place apples in single layer on dehydrator trays.
  4. Spray apples with lemon juice from your small spray bottle to keep the apples from turning a yucky brown color.
  5. Lightly sprinkle cinnamon on the apples.
  6. Turn on the dehydrator and set to 135 degrees.
  7. Check apples in 5 hours and consider flipping over (again depends on the design of your dehydrator).
  8. Cook for a total of 10 hours until apples are no longer mushy to the touch.
  9. Store in an air-tight bag or container.

Trust me, you will love how these make your house smell!! Yummy!  Making these apples yourself is super healthy and such a great way to help stretch your grocery budget!  My kids LOVE them and they are a super healthy snack for school!  Win win!

If you try them, let me know what you think!

HowToMakeDehydratedApples


Share this post:
facebooktwitterpinterest
August 2, 20160 commentsRead More
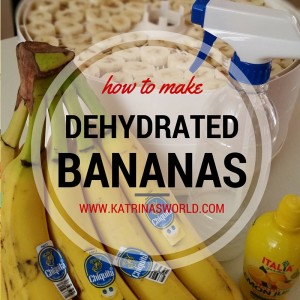
How To Make Dehydrated Bananas

How To Make Dehydrated Bananas

HowToMakeDehydratedBananasHi everyone!! It’s been awhile – and for that I’m sorry!  I’ve been so busy this summer enjoying every last second with my kids that I’ve made a conscience effort to step back from my blog.  It’s been a breath of fresh air actually – just taking a break.  I’ve really needed the time to think and just listen to the Lord speak into my life.

My summer has been great!  I hope yours has been too!  We’ve enjoyed tons of time with our family and friends, doing fun crafts – like making homemade chalk (I’ll discuss this in a later post – it was AWESOME!), spending much-needed time with cousins, lots of runs through the neighborhood and of course, tons of swimming!  My adorable neighbor across the street blessed with me with a hand-me-down food dehydrator and I’m trying it out today!  Which is what this post is really about actually – so Katrina, stop rambling all about ‘what you did this summer’….seriously!

We were at the grocery store this morning and there was an awesome deal on ripe bananas – as well as a of bags of discount apples.  All a sudden I remembered that my neighbor said I could have her old dehydrator and viola!  We purchased  about 3lbs of bananas and a couple pounds of apples and as soon as we got home we started prepping the bananas for the dehydrator.  I had the bright idea that I should spray the apples with lemon juice using a small water bottle instead of hand-dipping each one – just seemed a lot faster, and on a day like today, when I still have to find a place for a ton of cereal that I bought with some HOT coupons for super cheap this morning, I don’t have time to waste!  Plus, my daughter has a friend coming over soon and my oldest has a baseball game in a few hours!  I’m happy to report that it took less than 3o minutes to slice, arrange, and spray about 3lbs of bananas.  My dehydrator only has 4 trays, and I filled them all up, so I’ll have to wait until tomorrow to process the apples.  I’m super excited for how quick and easy this process was!  I set the temperature to 135 degrees and I guess they should be done in about 10 hours.

This is a great way to use up those over-ripe bananas that your kids think are too mushy to eat!  We tend to have a lot of those each week – seems like I never know what fruit my kids will want to eat and the poor bananas get ripe so fast!  The ripe ones will taste a lot sweeter too!  I plan to try blueberries soon and of course the apples!  So excited!  I love new ideas like this and also love finding frugal and fun ways to stretch every dollar – especially with our food budget!

How To Make Dehydrated Bananas

You will need:

  • 3-5lbs of ripe bananas (depends on who big your dehydrator is)
  • Food dehydrator
  • Small spray bottle
  • Juice from one lemon or 2 Tbs of bottled lemon juice
  1. Peel and slice the bananas the same thickness so they dry evenly – 1/4″ is perfect
  2. Place bananas in single layer on dehydrator trays
  3. Spray bananas with lemon juice
  4. Turn on the dehydrator and set to 135 degrees
  5. Check bananas in 5 hours and consider flipping over (again depends on the design of your dehydrator)
  6. Cook for a total of 10 hours until bananas are no longer mushy to the touch.
  7. Store in an air-tight bag or container.

Easy, fun, frugal, and so yummy!  Enjoy!

HowToMakeDehydratedBananas

Share this post:
facebooktwitterpinterest
July 29, 20160 commentsRead More
Why You Should Use IBOTTA

Why You Should Use IBOTTA

WhyUseIBOTTAEver wonder what IBOTTA is all about?  Have you heard people talking about how great it is?  Have you read bloggers who have written about IBOTTA being their favorite coupon app?  Well, you have come to the right place and I’m just one more blogger who absolutely LOVES IBOTTA and would love to tell you why you should use it too (I guess that’s also my way of saying to stop reading right now if you don’t want a super-easy way to save money on the groceries that you already buy).

IBOTTA is a very easy-to-use coupon app for your smartphone.  Available for both Android and Apple devices and is free to download.  If you join IBOTTA via a friend referral code you will instantly earn $10 after you redeem your first rebate.  You can sign up now via my referral code – SIGN UP NOW so you don’t miss out on that extra $10!  The great part signing up via a friend is that your friend also earns a $5 reward for signing you up!  It’s a win-win!  After you have joined IBOTTA you can start referring your own friends and you will make $5 for every friend you refer that signs up via your own personal link and redeems at least one rebate, plus they also earn that $10 reward as well!  Can you see why I think IBOTTA is awesome?!

Don’t wait, go ahead right now and get signed up – SIGN UP NOW, and then once you have the app installed on your phone, continue reading.  I’ll wait, seriously, go ahead.  SIGN UP NOW

Now that you have the IBOTTA app installed, let me give a quick overview of some the great things IBOTTA can do and how you can save
the most money:

  1. How IBOTTA Works: Download the app, unlock rebates by browsing the app before you go shopping, go shopping and buy the items you unlocked, verify your purchases and upload a quick picture of your receipt, then get cash loaded to your account.  SO EASY!
  2. Extra Savings on Groceries:  You will see that the IBOTTA app works at most major grocery stores and you can useIbotta-logo IBOTTA and paper coupons to purchase the same item!  For a lot of things that you mean you can get them for free with the double savings.
  3. Not only for groceries:  I use IBOTTA mostly for savings on my groceries, but you can also earn rebates at restaurants, on electronics, clothing, even movie tickets, and so much more!
  4. Redeem for CASH! After you have earned $20, you can redeem your earnings for cash, or gift cards to great places like Starbucks or the movies!

Now do you see why I love IBOTTA?!  If you still haven’t downloaded the app, do it now,  SIGN UP NOW and start saving and making money today!

Some links in this post are affiliate links, thanks for using them – while they help you save money, they also support me and my blog.

Share this post:
facebooktwitterpinterest
March 12, 20160 commentsRead More