View Sidebar

Archive for category: How To

How To Throw A Hot Wheels Birthday Party

How To Throw A Hot Wheels Birthday Party

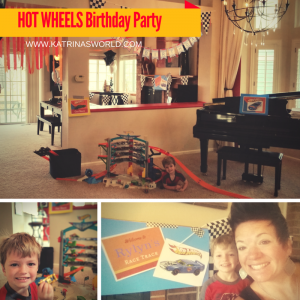
HotWheelsThemedPartyMy youngest son, Rylyn, just turned 5!  We had such a fun birthday party for him – you see, Rylyn used to love trains more than anything – but as the years have gone by, his love for trains has turned into a love for all things cars, especially Hot Wheels tracks and cars.  He loves them!  When we started to think about themes for his birthday party, we knew we had to do a Hot Wheels themed party.  If you have been reading my blog for a while, then you know that I love to plan birthday parties for my kids and I love to plan over-the-top fun parties on a serious budget – in my mind, there is no other way to do it!  I think if you work at it, you can absolutely have an amazing birthday party for your child without spending a lot of money – and, you can do it from home (which saves even more money)!


I wanted to make this party for Rylyn extra special because it’s the first “friend” party he’s had!  I know what you are thinking, Katrina, he’s 5, why in the world is this his first real party?  Well, I’ll be real honest with you, take a seat…. I’m a mom of 3 kids, and he’s the 3rd kid.  Simple as that – plus I’m smarter now.  :)  I didn’t want to start off this awesome birthday party tradition with Rylyn too soon, because I have many years ahead of fun parties with him.   He’s a crazy boy with so much energy, that I honestly wanted to put off the “friend” parties with him for as long as I could.


This was the first year that he finally noticed the fun parties that my other kids had and was already planning his own party.  When I think back on it now, I can’t believe that my oldest son, who turned 10 this year, has had 10 amazing at-home birthday parties.  His parties have been over-the-top!   He’s had really fun themes like: Messy Party, Star Wars, Science Lab, Minute-To-Win-It, etc.  My daughter, who turned 7 this year, has had a few less than my son (you see, I was starting to wise-up).  Her fun at-home parties started when she was 3 with her first “friend” party.  She’s had 4 great years of fun parties with themes like: Tea Party, Italian Cooking Party, Cheerleader Party, Daddy-Daughter Construction Building Party, etc.  Now that we are on to my 3rd, I’m older and wiser and think it’s ok that he’s just starting his “friend” party tradition.


When I’m planning a birthday party I start out by making a quick Word doc with all my ideas of themes that they might like.  I then make a guest list and ask for input from my child on who they would like to invite.  We go over the themes and I let them pick one.  Thankfully this year I pretty much knew what theme he was going to pick, it was either going to be Trains or Hot Wheels.  He chose Hot Wheels and I was off the races to start coming up with games and things to do for a November Hot Wheels party indoors with a bunch of 5 year olds.  What in the world can you do inside with car track? I did what any mom would do, I got on Pinterest to see what everyone else has done.  I found a lot of great pins for decorations for a “car-themed” party, but I know my son, and he could care less about the décor, he’s all about the fun things you would DO at the party.  He’s a very active boy and so are his friends, I knew I needed to keep them very busy or I’d lose control of them all.  I really didn’t find very many ideas at all of fun Hot Wheels themed activities we could do and was bummed.


It was close to Halloween and I still didn’t know what we were going to do at this party, but I had the invites made, the décor picked out and a cake ordered (from my mom of course).  A local high school in our area was hosting a Halloween Party for little kids, so we got ours all dressed up and headed over there for the free candy!  Once inside they had transformed the whole school into a Candy Land themed Halloween Party with tons of carnival games and it struck me, we could do that for Rylyn’s party!  Carnival type games that are Hot Wheels themed!  Genius!  My older son even mentioned to me much later that we should do a bunch of those simple games for Rylyn’s birthday party because Rylyn had so much fun and so did all the kids his age!  He even offered to help me make the games, and viola, we were off and running.  I was pumped because they all were fairly simple and inexpensive to put together, and they would work as indoor or outdoor games if the weather was nice enough (which at the time I had no idea what the November weather in Colorado would be like).  We got super lucky and had very warm weather the day of his party and could do most of the games outside, but I’m getting ahead of myself.


Here are all the game stations we came up with:


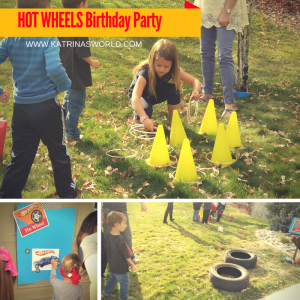
  • “Tire Toss” – We set up some old tires which I just so happened to as we had just put new tires on one of our vehicles.  YouHotWheels6 could also use ring shaped floaties used for the pool for kids who can’t swim yet.  You just set up the tires staggered and use beanie bags to toss into the tires.  If they make it into a tire, then they win a prize.
  • “Ring Toss” – We used glow necklaces hooked together to make a ring and had the kids toss them on to yellow caution cones that I happened to have for coaching soccer.  I found both at the dollar store.  The children had to take a “tire” glow necklace and toss it onto the cone.  If they made it, they won a prize.
  • •“Pin Wheel”– Think of Pin the Tail On The Donkey, same idea but I made a big poster board of a Hot Wheels Car instead.  Then I printed and cut out a page of small tires.  At this station, I had my dear friend give each child a tire with some tape on the back and after they spun the child around a few times, blindfolded, they got to try to get their tire on the Hot Wheels Car.  We gave everyone candy for just trying this one no matter where their tire ended up.  I hung this poster on my garage and it worked out great.
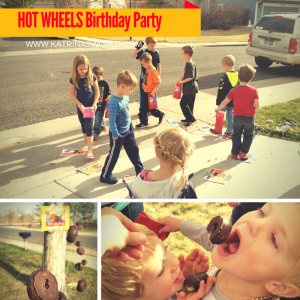
  • “Car Walk” – Just think of a good old fashioned Cake Walk!  Same thing, except if your number is called you win candy instead of a yummy baked good.  J I made numbers 1-10 and taped them to my driveway for the kids to walk on.  We played music and when we stopped the music you had to be on a number.  You would then pick a number out of a jar and whatever number was called won a piece of candy.  My daughter helped with this station and loved every second of it.  Hands down, this was the wall time favorite station by all the kids at the party.  I mean, who doesn’t love a good ‘ole cake walk?!HotWheels5
  • “Tire Eating Contest” – This was so fun!!! We hung mini chocolate donuts, which were the “tires” with fishing line from a low branch on our big tree in our front yard all at different lengths.  We then lined all the kids up in front of a donut that hung basically right in their face.  At the same time, with their hands behind their backs, they had to eat the donuts without touching them.  HILARIOUS to watch and so yummy!  The kids loved this one as well.  We only did this station one time as a group.
  • “Car Race”  – this was the last activity.  My older son built a Hot Wheels track that went down our stairs and made the cars go really fast!  We had everyone use the Hot Wheels car they were given from the “Car Fishing” game to face off with each other and see which car was faster.  I initially planned to make a big tournament poster with individual heats for the cars to race, but time got away from me and I realized that being 5 year olds, they didn’t really care who won!  They just wanted to race!
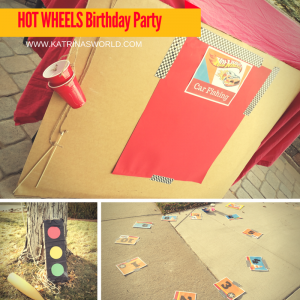
  • “Stop Light Piñata” – I made a VERY simple piñata from a tall rectangular Amazon box and stuffed the candy in the bottom of the box.  Taped it together and then decorated the box by wrapping black streamer paper all around the box completely covering it.  Then I cut out a red, yellow, and green circle from construction paper and taped them on the front of the box and it looked just like a stop light.  We hung the piñata from our front tree and used a very hard baseball bat toHotWheels4 whack it.  I was worried it might have a hard time busting open because it was a real cardboard box, but thankfully, that also meant that each child got to hit the box a few times and then we let the birthday box pound on it until it all feel apart – which he loved.  Was a very cheap way to make an adorable piñata.  This was another all group activity that we did only one time.
  • •“Car Fishing” – This one is where you hold a fishing pole with a string hooked to it, then the child tosses it over a big board and the person behind the board hooks a toy to the string and tosses it back like the child “caught” a fish!  We changed it up a bit and attached a red Solo cup to the end of a string on a wooden pole I had.  When they child tossed it over they were given a brand-new Hot Wheels car in their cup! They all seemed to love this and the best part was that the Hot Wheels cars are usually on $1!  We then planned to have each child keep that Hot Wheels car and use it for the Car Race that would happen later.


Other Things I Made:

The Decorations:
HotWheels3If you have read my posts from my other parties, you know I like to keep things cute, but simple and budget-friendly!  Rather than buying official Hot Wheels branded décor, I believe in picking solid colors that match and making my own birthday banners out of poster board and ribbon, and making my own signs and hanging them up.  Plus, we always use matching streamers.  I also made a simple tablecloth for the main table to look like a road.  I picked up a black plastic tablecloth from the Dollar Store as well as some white duct tape made my own road!  It was cute and cheap!  Don’t forget the balloons!  I always get about 10-15 solid color balloons and disperse them around the house – as well as outside so it sets the mood when you guests arrive!  Simple, cheap, and awesome!

Signs:

I made my own signs FREE from my favorite website – Canva, that I glued onto poster board and hung it up near each station.  I also recruited a few parents and family members, even my older kids, to run each station so that they could help the kids and hand out prizes.  My prizes consisted of a lot of candy (that I recycled from Halloween, and small little toys like pencils, erasers, stickers, that were again recycled from Halloween and that I picked up at the Dollar store).  I tried to find some fun Hot Wheels themed prizes, but when they got too pricey, I figured kids love candy and I had a TON from Halloween that was just a week before his party!

Goody Bags:

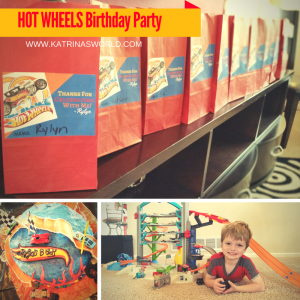
These were very necessary as the children needed a bag to carry around during the entire party so that they could put all the candyHotWheels2 and treats they won at each station – as well as when we did the piñata.  I kept these simple as well, I just picked up a package of red paper lunch bags that I found from my local Dollar Store and printed out a small tag that I made on Canva.com for each bag that I glued to the front and added each child’s name.  I had these sitting out so each child could grab their bag when they arrived to the party.
The Cake:

My mom is our cake maker extraordinaire!  She makes the cakes for my kids every year and they are  amazing!  The best part about her cakes is that they are gorgeous and usually make for an awesome focal point on the main table.  This year, she out-did herself with a Hot Wheels cake that had a tunnel right through the middle that you could drive a Hot Wheels car through (that was the request from the birthday boy)!   Even if you can’t make an extravagant cake, there are so many cute ideas on Pinterest for cakes, treats, and cupcake that go right along with the theme.  If I didn’t have my mom to make the cake, I was going to go with something simple – a “tire” donut cake!  Just take a bunch of small chocolate donuts and stack them up on a plate just like a bunch of tires. Then stick a candle on top and there you go – a “tire” cake!  Viola and super simple, plus this would be very inexpensive!

Invitations and Thank You Cards:
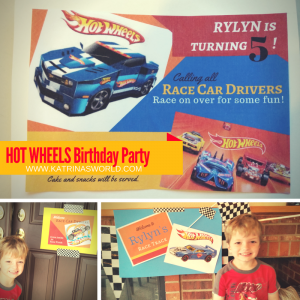
HotWheels7I also made my own invitations on Canva and used the same layout to make a thank you card.  I like to make invites that are simple 3.5 x 5 in postcards that are 1 sided that I can put in an envelope or pop right in the mail as a postcard.  It’s much faster to just make your own, print them out and mail, versus hunting down a matching invitation at the store and hand-writing in all the info (at least it is for me).  Plus, I love to make stuff on my own and personalize it!


It may sound like a lot of work, but besides making the signs and few other décor items, it really wasn’t that bad!  The party was a lot of fun and really you could use the same games to fit any theme for any party!  My son loved this 5th Hot Wheels birthday party and for me, that’s all that matters!


HotWheelsThemedParty


Share this post:
facebooktwitterpinterest
February 27, 20170 commentsRead More
Time to Tidy Up: Tackling My Closet

Time to Tidy Up: Tackling My Closet

ClosetMarie Kondo’s book, The Life-Changing Magic of Tidying Up, says the best place to start tidying in your home is your closet.  Well, I did it.  Oh-my-goodness.  That was a HUGE job, but it didn’t hurt nearly as much as I thought it would.  Phew.  I’m glad it’s over and I can’t believe how clean I feel – not just because my closet is clean, but my overall life is starting to feel cleaner, and I love it!

Are you ready to begin tidying your life?   Well, here is how you at least tackle your closet.  First of all, Marie says you should gather every last bit of your clothing in your entire house and put it all in one pile on the floor.  I laughed out loud when I first read this.  I remember thinking that I could just leave a few coats and gloves in the downstairs closet and not worry about them, as well as keep my swimsuit in the laundry room –  but the book says to gather every last bit of clothing – gloves, hats, coats, everything.  If you don’t get every last piece you won’t fully immerse yourself in the process…I drug my feet because it seemed like a lot of work, but eventually I grabbed a laundry basket and gathered everything and hauled it upstairs to my room.  I took every single piece of clothing out of my closet – shirts, jeans, fancy dresses, suits, bras, purses, scarves, etc.. – EVERYTHING!!!

I even pulled out my precious tubs of maternity clothes (which I had 3 giant plastic tubs worth) which I swore I would never get rid of.  The dust on top of, behind, and around these maternity tubs was thick, and I was beyond terrified to get rid of any of it.  I’ve had such a journey the last 11 years of being a mom and so many memories are tied to those maternity clothes.  I could not imagine going through them, let alone getting rid of any of them, but I pulled them out of the closet and piled them up with everything else.

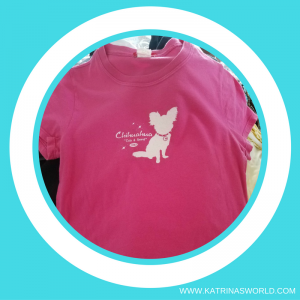
After it was all piled up on the floor I sorted it into clothing types and tackled my shirts first.  I was doing great at discarding shirts that were lumpy, stained, pilled, and had holes in them until I found the pink glitter chihuahua shirt.  I got stuck.  I sort of freaked out.  I put it in the discard pile and then I grabbed it back out.  I panicked.  That shirt has such deep memories.  Does is spark joy?  Yes, it does.  It sparks all sorts of memories of a wonderful life I’ve had with my spouse.  I got that shirt while I was dating my husband and was dreaming of marrying him, having kids and of one chihuahuashirtday having a little white chihuahua that I would name Lucy.  For real.  I loved pink, glitter and little dogs and felt like my whole life was ahead of me.   Great memories that make me wish life was simple again.  I cannot part with that shirt, even though I’m fairly positive that I”ll never actually wear it again.

I continued on with my sorting and then my daughter walked in to see what I was up to.  She immediately asked if we could do her room too!  That’s my girl!  Love her!  It’s funny how if you start organizing your own life, that others watching want to do the same thing.  This also applies to my husband.  When he got home that night, he was so amazed at the transformation of my side of the closet that he immediately starting pulling things out of his side of the closet to discard.  :)

Back to my process – I started to fill up bags and bags of clothes to be donated – it’s was liberating and felt wonderful!  When everything else was sorted, I finally tackled the tubs of maternity clothes.  I had to scrape off a layer of dust just opening them.  Ewww.  I plunged ahead and was really surprised when I made it through the first tub and easily discarded all of it.  Nothing sparked joy.  All of the items in the first tub were very  big and out of style – they were 11 years old and from my first pregnancy – I was gigantic when I was pregnant with my oldest.  I hated everything about being pregnant with him.  I was uncomfortable, sick all the time, hungry all the time, wore very big maternity clothes, and when I picked them up and examined them, they gave me a feeling of yuck.

In the donate bag they all went and this process continued until I came to the last tub with all my cute clothes from when I pregnant with my daughter.  I loved being pregnant with her.  I was super thin because she made me sooo terribly sick all the time that I could barely eat, it was summer and I love summer maternity clothes, and overall I felt like a rock-star mommy.  It was one of the best years of my life.  I loved the attention of being pregnant, I felt cute the whole 9 months, and I was elated to be having a girl!  I loved all my maternity clothes I wore during that time – they were colorful, cute, and I would wear them all again if I had another baby.  I even loved my maternity swim suit – and honestly, who can say they love a swim suit?  Needless to say, I kept about 12 items, including my swimsuit and that was all I kept from my 3 big maternity tubs.  These items fit in a small diaper box.

I’m so glad I took the plunge and opened up those bins – because it taught me I was holding onto memories that I didn’t need to hold on to anymore.  I don’t plan to have any more kids, but if I do, then I still have a few cute items that I love dearly.  I’m sure at some point down the road, I will discard that box, but for now, I’m so proud of myself for purging 3/4 of a category of things I had that were not exactly what I thought.  I didn’t need to take up a huge space in my closet holding onto things that I didn’t really even like when I further examined them.  Again, it’s liberating to get rid of them!  I also know that someone else could use all of those clothes that I no longer needed, so I posted 3 garbage bags of maternity clothes size Small, Medium, and Large on a local Free Facebook group that I’m a part of and all 3 were picked up the next day by ladies who needed them.  It’s a win-win!

It only took me 3 hours to complete my closet.  I spent the next hour vacuuming, dusting and cleaning my closet floor which had not seen the light of day in probably 6 years.  When you have so much crammed in a tiny space it’s more effort than it’s worth to clean under and around it.  Right?  I love all the white space on my side of the closet now.  Love it!

I learned a lot about myself by the items I decided to keep.  Sorting through your clothes tells you a lot about who you are.  I discarded a lot of things that I’ve held onto for a long time – fancy dresses, high heels, jeans, suit jackets from my working days, etc.  I held onto my leggings, tunics, yoga pants, athletic gear, and running shoes.  Wow.  It’s weird to even write that.  My fashion sense and lifestyle have changed a lot in the last 20 years (yes, there were things in my closet that I’ve had for 20 years).  Honestly, I’m not sure what this says about me.  I’m still thinking about it and mulling it over in my head.  My husband did comment that I used to dress a lot fancier when he first met me.  Of course I questioned him about that and he just said it was an observation, but it did worry me.  Am I looking to mom-ish?  Just stuff to think about.  Wow, who knew that tidying my home could go so deep?

So, what has tidying taught you?  Have you sorted your closet?  How did that go?  Can’t wait to hear all about your tidying journey….

Closet

Share this post:
facebooktwitterpinterest
January 7, 20170 commentsRead More
Katrina’s Coupon Tip #14 – Call Your Cable Company

Katrina’s Coupon Tip #14 – Call Your Cable Company

CouponTip14_CallCableCoDid you know that you can save money each month on your cable bill by calling them?  It’s really as simple as that – promise!  You know how I feel, you sign up for the 2-year introductory price that is a smoking deal + they give you extra channels and then your husband loves you because they also give you all the NFL channels for FREE.  But there is a catch, this deal is only offered for the first 2 years and by then, you know you LOVE their service and all the amazing channels.  It’s like a punch to the gut when you get your first bill after this 2-year introductory period is over and the bill is tripled in price.  Ugggh!!  For a money-saving mom like me, I just couldn’t imagine paying full price for our cable bill.  It was either stick with our current cable company and hope for a discount or switch to another cable company and see what type of introductory deals they could offer us.

Between you and me, I love our current cable provider so I was hoping that we would not have to switch, but we didn’t want to keep paying the high prices.  My amazing husband decided to give our current provider a call and see if there was any way we could cut down on our bill – or he was going to end our contract and switch to someone else.  You know what?  Calling them was a great idea!  He saved us a ton of hassle of switching to a different company and having to deal with changing equipment, etc. by just asking for a discount.  Crazy huh?  He was able to negotiate a $63/month discount + new equipment upgrade – all from simply asking for a deal!  In fact, our cable company told him that we could call them every 3 months and ask for the current promotion to be applied to our account for future savings with them!  Woot!  Woot!  I’m super excited!

Remember, if you call your current provider, they may not be able to give you the same discount we received, but it doesn’t hurt to ask and shop around!  Just remember to be polite – no need for demanding a deal.  If they don’t give you the type of discount you want, then call another provider.  Being polite goes a long way in receiving special deals – keep in mind, the company needs to make money too, so don’t be unrealistic when asking for discounts.

CouponTip14_CallCableCo

Share this post:
facebooktwitterpinterest
November 29, 20160 commentsRead More
How To Clean An Artificial Christmas Tree

How To Clean An Artificial Christmas Tree

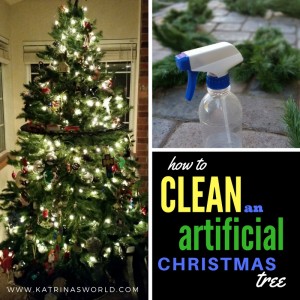
CleanChristmasTreeLast year around Christmas time I was really struggling with my allergies and I noticed that my allergies seemed a lot worse right after we put up our 15 year old artificial Christmas tree.  I didn’t make the connection at first, but I did notice 6 weeks later when we finally packed up our tree that I almost instantly started breathing better.  A light bulb went off in my brain and I realized that my Christmas tree may have been a big part of why I had been so sick during the holidays last year.

This year I’m determined to feel better during the holiday season and I decided it was time to clean my Christmas tree, afterall, we’ve had if for 15 years!  Honestly, I can’t believe that we have had this tree for so long, it’s super ‘old-school’, has individual branches that have to be put on one by one, but it works and it looks really nice once it’s all set up.  Don’t get me started on how long it takes to assemble, add the lights, and ornaments (I hate this job as much as my kids love it), but today I’m thankful that I don’t have a pre-lit tree because if I did I would never be able to clean it so thoroughly.  I’m super envious of all of you out there that have pre-lit trees – the ease, the simplicity…oh man….(drooling over here), but I’ve also heard horror stories about how the lights malfunction.

ANYWAYS, back to the topic at hand….as I was saying, I’ve got this super old, fake tree and I was bound and determined to clean it.  I begged my husband to get out the box from the basement and haul it outside to our back porch – it was warm, 80 degrees the day we did this.  Here’s what you need to do:

Supplied Needed:

  • Spray bottle
  • Lemon Juice
  • White Vinegar
  • Hose
  • Artificial Christmas Tree

Directions:

I gathered up the kids and had them lay out each branch of the tree.  I gave each of them a spray bottle filled with a solution of white vinegar, lemon juice, and water and asked them to spray all sides of each branch.  I let that sit for about 15 minutes and then I got out my hose and sprayed off each branch completely.  After all the branches were thoroughly rinsed, I shook off the excess water from each one and laid them on the dry patio in direct sunlight.  I left them outside to dry for the entire day and flipped them over about 5 hours into the day.  At the end of the day I made sure they were completely dry and then I packed the branches back up in the box and was done.

They smelled GREAT too!  I’m super hopeful that this cuts down on the all the dust and helps keep my crazy allergies at bay.  It sounds time consuming, annoying, and hard to do, but it was super easy, quick and I feel great knowing it’s over and done with!  Hope that helps!  You can do it too!  Let me know if it helps – I’m crossing my fingers that it will help my household breathe better this Christmas!

CleanChristmasTree

Share this post:
facebooktwitterpinterest
October 25, 20160 commentsRead More
DIY Easy Pinecone Door Hangers

DIY Easy Pinecone Door Hangers

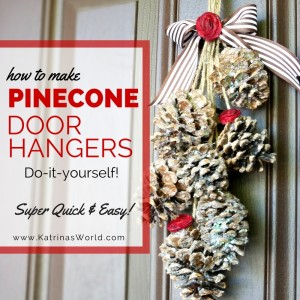
HowToMakePineconeDoorHangersFall is my absolute favorite time of year!  It makes me want to bake, decorate and craft all at the same time!  I see a pumpkin and all of a sudden I need a Pumpkin Spice Latte and a whole bunch of glitter and I’ll whip up something amazing!  Last fall I made a whole bunch of glittered pinecones for a magical tea party that I hosted for a bunch of women who were very dear to my heart.  I saved the pinecones (thank goodness) and this year I decided I wanted to use them to create door hangers for my double front doors.

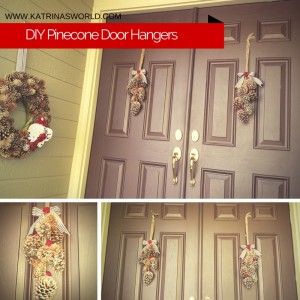
I struggle with how to decorate my front doors because there are two of them!  It’s hard to figure out what I should put on them as decor.  I feel like I need two of every decoration and that drives me crazy, especially when I want to make a wreath and know that I have to make two of them.  I’ll let you in on a little secret, if you think I’m obsessed with glitter you are totally right, but I also have an obsession with wreaths as well.  Call me crazy, but it’s true.  When I see an adorable wreath on Pinterest or hanging on my neighbors’ front door, I get super excited, but then immediately annoyed knowing that I’ll have to double my efforts in order to put them on my front doors.  Knowing the pain it is to duplicate decor for my front door, I was pretty excited when I came up with this idea to make quick pinecone wall hangers.

A lot of the stuff I create and do is born out of necessity or because it’s quick, easy, and is made from things I have laying around my house already.  I know you may not have all these things magically laying around your house, but I’ll give you a good idea on how to locate the necessary items so that you can quickly make these too.

The supplies below are enough needed to make 2 door hangers.  If you have only 1 door, you only need 10-12 pinecones.

Supplies Needed:

  • 20-25 Pinecones (Small, Medium and Large Sizes and Shapes) - I found mine in my neighborhood under a couple different pine trees so I could have different shapes and sizes.  You can also buy pinecones at any craft store.  
  • Mod Podge Gluing Medium
  • Foam Paint Brush
  • White Glitter – Large Flakes and Super Fine Flakes
  • 1in Brown and White Striped Craft Ribbon – 1 yard (For Decorative Bow)
  • 2in Red Wired Craft Ribbon – 3 yards (For Roses)
  • Glue Gun - I personally like the HOT temperature glue guns, I feel like they glue stuff in place better than the low temperature ones.
  • Glue Sticks
  • Twine
  • 2 Paper Plates

How To Make  Glitter Pinecone Door Hangers:

  • Choose a pinecone and paint it heavily with a layer of mod podge.  Mod podge dries clear so don’t worry if it’s not perfect.  I like a lot of glitter so I used a lot of mod podge.
  • Over a paper plate, sprinkle the large flake glitter all over the pinecone and shake off the excess. Don’t worry if you don’t cover it completely.
  • Sprinkle the super fine flake glitter all over the pinecone filling in all the spots missed with the large flakes.  Cover it completely and shake off the excess.  Set the pinecone aside to dry.
  • Repeat the above steps for all the pinecones.
  • While the pinecones are drying, cut twine 28 inches long.  Cut as many twine pieces as you have pinecones for.Pinecone2
  • Cut your 1 yard brown and white striped craft ribbon in half into two equal strips - this ribbon is for the decorative bow.
  • Cut two 8″ strips of red wired craft ribbon – these are for the roses that go on the bow.
  • Cut eight 6″ strips of red wired craft ribbon – these are for the roses that go on the pinecones.
  • While you wait for the pinecones to finish drying, you can make the roses.  Plug in your glue gun.
  • Take one of the 8″ strips of red wired craft ribbon and fold one of the ends into each other and begin wrapping it around the center.  Twist the ribbon as you go and continue wrapping it around the center to make the form of a flower.  Place a small dot of glue on the side as you are wrapping around the edge to glue the flower in place.  Continue wrapping, twisting, and gluing until you have used all the ribbon.  When you reach the end you will glue the ends around the back of the flower to finish it off.
  • Make all 10 roses and set aside.  Each of them will look a little different and be a little different in size, which is ok!
  • After all the pinecones are dry and covered with glitter select a larger one and turn it upside down so that the tip is pointing down.  Find a small spot where one of the scales of the cone is open and squeeze in some glue.
  • Take a piece of cut twine and secure one end it into the glue, this will hang your pinecone.  Make sure you have enough glue to keep the twine secure.
  • Add twine to all of your pinecones.
  • Divide your twined pinecones into two equal piles of number and sizes.
  • Start with one pile and one by one pick up a twined pinecone and start arranging them, holding them by the twine.  After all have been arranged nicely tie a knot with all the twine at about a yard in length, or as long as you want them to be.  The knot is how they will hang on your door, so you pick the length.  After you tie off the knot, and are happy with the length, trim the extra twine ends.
  • Assemble the second set of pinecones and repeat the above step, making sure they equal in length so they look good hanging next to each other on double doors.
  • TIP: I hung my pinecone sets on hooks next to each other and assembled them while they were hanging.  This helped me know exactly what they would look like when they were finished, and I also made sure they will even in length.
  • Take your brown and white striped craft ribbon and tie a bow around the twine and slide the bow downward towards the cones to where they are almost touching the top cone of one of the sets of pinecones.  Repeat with the other set.
  • Take one of the 8″ roses and glue it right in the middle of the bow.  Repeat with the other set.
  • Take four remaining roses and glue them on the top of 4 of the bigger pinecones in one of your sets.  Repeat with the other set.
  • Done!  Go hang on your front door!  Way to go!

I Promise these are easier than you think!  You can also choose different colors of ribbon for your bow and roses if you’d like.  I used the colors I had already at home and they just so happen to match a pinecone wreath I made a few years ago that I hang near my front door.  You can absolutely do it!  Snap a photo if you decide to try them, I’d love to see how they turn out!  Way to go momma!


HowToMakePineconeDoorHangers

Share this post:
facebooktwitterpinterest
October 13, 20160 commentsRead More
How To Make Homemade Chalk

How To Make Homemade Chalk

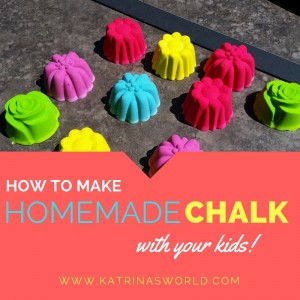
ChalkThe summer was amazing and I’m totally honest when I say this – not long enough!  I love to have my kids at home with me – YES, they drive me absolutely crazy, but I love to have them around – all three of them.  We had many days this summer that we needed to escape the heat and be indoors and when we found ourselves bored, we’d either start baking or crafting!

About 7 years ago, my older son and I tried to make homemade chalk and let’s just say, it’s didn’t go so well.  It involved a little bit of food coloring, and toilet paper rolls and by the time they dried 5 days later, we never could get them out of the toilet paper rolls!  Don’t ask…it was a bad idea.  :)  So, it was time to try again!

I did some looking around on Pinterest and found a great post by Princess Pinky Girl all about how to make your own sidewalk chalk.  We followed this recipe pretty closely, but I’ll be honest, I didn’t really measure everything and we used a lot more of the paint – I mean, who doesn’t want super bright colors?  I’m so glad I did – because our colors are very bright and we love using these!  I did learn a few things along the way that might make it easier and we had to let our dry a lot longer than just 24 hours.  Thank you to Princess Pinky Girl for your great post and ideas!  Below is my recipe and what we actually did that worked well for us.

Homemade Chalk Recipe

Gather these items:

  • Plaster of Paris Dry Powder (I actually found a huge tub of this at a garage sale for super cheap – been saving it for awhile now – you can get at any craft store).
  • Tempura Paint (I got 7 bright colors and got big sizes – 24oz bottles.  In fact, another great sale was going on at my local Hobby Lobby – I paid only $1 for each bottle).
  • Silicon molds or candy melt molds (I had a silicon Pampered Chef cupcake flower mold that worked great, and I found a big stack of candy melt molds at a garage sale for less than dollar – these worked really well).
  • Over-sized Disposable Cups
  • Plastic Spoons
  • Water

Homemade Chalk Recipe:

  • We mixed up each color in it’s own disposable cup.  I started out with only 3 colors to begin with because I have 3 kids and I wanted them each to have their own color to mix up.  The amount of colors you can make with this recipe will depend on how many molds you have on hand.
  • Fill each up with about 3/4 cup of water.
  • Add about 1/2 cup of paint to the water and mix well.  The original recipe says about 1/4 cup of paint, but I really liked the super bright colors that we achieved with 1/2 cup of paint.
  • Next, add 1 cup of the dry plaster of paris powder and start mixing with your plastic spoon.  Make sure to mix really well. I did learn that if you don’t get it all completely mixed up you will have pockets of the white plaster of paris in your dry chalk that never was mixed with the paint.  Not a big deal, but a bummer when you are coloring something very specifically and it turns white on you.  Double check after your kid’s arms tire out and make sure there are no lumps.
  • Pour into molds and then very gently pound the mold on the counter to pop any air pockets or bubbles and to completely flatten.
  • You can layer different colors in the molds, just don’t mix them up.  It does dry really with really cool swirls in it!
  • Let them dry for at least 3 full days before you try to take them out of the molds.  They will pop right out of a mold when they are completely dry.  If you try to pop them out too early, they actually crumble and that’s a bummer (Yes, this happened a few times to us).  The candy molds dried much faster than the cupcake molds.  If you can set them to dry outside in full sunlight, they may dry much faster.  You can tell when they are NOT dry by the color change they have – the outside edges will dry lighter in color and if the inside is still well, it will look darker and like it has a wet spot on it.  My candy molds dried in about 3 days and I did eventually turn them upside down so that the bottom would dry as well – a few actually fell out once they were dry.  My flower regular sized cupcake molds took about 6 full days to dry all the way and at about 4 days, I was able to pop them out and I set them outside in the full sun to dry all the way, which took another 2 days.

The colors are awesome, bright, and so fun to use!  My kids love this chalk and we have a great time using it!  I love this chalk because the colors are so fun!  I can’t wait to make this recipe again and am now on the hunt for more fun candy molds at garage sales.  I would totally recommend making this chalk with your kids – it’s really a fun, easy, and pretty quick craft!  I’m hoping to make some as gifts to give the cousins for Christmas!

Let me know if you try this recipe out!  Happy coloring!

Chalk

Share this post:
facebooktwitterpinterest
August 16, 20160 commentsRead More
How To Make Dehydrated Apples

How To Make Dehydrated Apples

HowToMakeDehydratedApplesYes, I know it’s summer, but my house smells like Fall!  What’s better in fall you say?  Apple Pie!  Yes!  My house smells like Apple Pie and here’s why – I’m dehydrating a bunch of apples today!  Yummy!!  A neighbor came over and when I opened the door she told me my house smelled amazing and she wondered what candle I had burning!  I told her I didn’t have a candle lit, but was making dehydrated apples – she was impressed!

I’m not kidding, it really smells awesome and I can’t wait to make them this fall!  They are so easy too – and I think they are even easier than the dehydrated bananas.  I sort of feel like I’m a pro now at this (ya know, because I have dehydrated one batch of bananas and one batch of apples – :) – yep just pass me my pro status ribbon right now!) – so I have a few extra tips on how to make dehydrated apples quick and easy.

For starters, my dehydrator only has 4 trays – so I can’t do a lot at the same time, but I did realize you can prep a whole bunch at once and save half the batch for later.  If you have fewer trays like I do, then peel/slice/core your apples and place all the extra apples in a big bowl filled with a bit of water and lemon juice.  Cover and store in your refrigerator until you are ready to dehydrate.  I did one batch during the day (about 8 medium to large sized apples), and then cooked the second batch overnight.  This totally happened by accident, I really had no idea how many apples my trays would fit so I ended up buying a 5 bags of 3 apples each on clearance at the grocery store and prepped all of them at once.  :) Silly me!  But I was happy to prep and save all the extras.  It worked out great!

One other tip, if you plan to do this a lot, then make sure you get an Apple Peeler/Slicer/Corer machine – I know Pampered Chef sells one, so does Williams and Sonoma (which is the brand I have – I’m lucky though, I found mine at Goodwill for $5).  I tend to use mine a lot and it makes the whole process so much faster and super fun for your kids to help with!  It’s messy and sticky, but a lot of fun!

How To Make Dehydrated Apples

You will need:

  • Food dehydrator
  • Small spray bottle
  • 15 medium size apples
  • Juice from one lemon or 2 Tbs of bottled lemon juice
  • Cinnamon
  • PAM or Misto filled with Olive Oil
  1. Peel, core, and slice the apples the same thickness so they dry evenly – 1/4″ is perfect.  I used an Apple Peeler/Slicer/Corer.  I picked mine up at Goodwill for $5 and I LOVE it!  Makes peeling super fast and my kids love to help with it.  Also, apples are sliced the same thickness which is helpful for drying.  If you don’t have a Peeler/Slicer/Corer, you can do it manually.
  2. Lightly srapy your dehydrator trays with olive oil or PAM to help with sticking.
  3. Place apples in single layer on dehydrator trays.
  4. Spray apples with lemon juice from your small spray bottle to keep the apples from turning a yucky brown color.
  5. Lightly sprinkle cinnamon on the apples.
  6. Turn on the dehydrator and set to 135 degrees.
  7. Check apples in 5 hours and consider flipping over (again depends on the design of your dehydrator).
  8. Cook for a total of 10 hours until apples are no longer mushy to the touch.
  9. Store in an air-tight bag or container.

Trust me, you will love how these make your house smell!! Yummy!  Making these apples yourself is super healthy and such a great way to help stretch your grocery budget!  My kids LOVE them and they are a super healthy snack for school!  Win win!

If you try them, let me know what you think!

HowToMakeDehydratedApples


Share this post:
facebooktwitterpinterest
August 2, 20160 commentsRead More
How To Make Dehydrated Bananas

How To Make Dehydrated Bananas

HowToMakeDehydratedBananasHi everyone!! It’s been awhile – and for that I’m sorry!  I’ve been so busy this summer enjoying every last second with my kids that I’ve made a conscience effort to step back from my blog.  It’s been a breath of fresh air actually – just taking a break.  I’ve really needed the time to think and just listen to the Lord speak into my life.

My summer has been great!  I hope yours has been too!  We’ve enjoyed tons of time with our family and friends, doing fun crafts – like making homemade chalk (I’ll discuss this in a later post – it was AWESOME!), spending much-needed time with cousins, lots of runs through the neighborhood and of course, tons of swimming!  My adorable neighbor across the street blessed with me with a hand-me-down food dehydrator and I’m trying it out today!  Which is what this post is really about actually – so Katrina, stop rambling all about ‘what you did this summer’….seriously!

We were at the grocery store this morning and there was an awesome deal on ripe bananas – as well as a of bags of discount apples.  All a sudden I remembered that my neighbor said I could have her old dehydrator and viola!  We purchased  about 3lbs of bananas and a couple pounds of apples and as soon as we got home we started prepping the bananas for the dehydrator.  I had the bright idea that I should spray the apples with lemon juice using a small water bottle instead of hand-dipping each one – just seemed a lot faster, and on a day like today, when I still have to find a place for a ton of cereal that I bought with some HOT coupons for super cheap this morning, I don’t have time to waste!  Plus, my daughter has a friend coming over soon and my oldest has a baseball game in a few hours!  I’m happy to report that it took less than 3o minutes to slice, arrange, and spray about 3lbs of bananas.  My dehydrator only has 4 trays, and I filled them all up, so I’ll have to wait until tomorrow to process the apples.  I’m super excited for how quick and easy this process was!  I set the temperature to 135 degrees and I guess they should be done in about 10 hours.

This is a great way to use up those over-ripe bananas that your kids think are too mushy to eat!  We tend to have a lot of those each week – seems like I never know what fruit my kids will want to eat and the poor bananas get ripe so fast!  The ripe ones will taste a lot sweeter too!  I plan to try blueberries soon and of course the apples!  So excited!  I love new ideas like this and also love finding frugal and fun ways to stretch every dollar – especially with our food budget!

How To Make Dehydrated Bananas

You will need:

  • 3-5lbs of ripe bananas (depends on who big your dehydrator is)
  • Food dehydrator
  • Small spray bottle
  • Juice from one lemon or 2 Tbs of bottled lemon juice
  1. Peel and slice the bananas the same thickness so they dry evenly – 1/4″ is perfect
  2. Place bananas in single layer on dehydrator trays
  3. Spray bananas with lemon juice
  4. Turn on the dehydrator and set to 135 degrees
  5. Check bananas in 5 hours and consider flipping over (again depends on the design of your dehydrator)
  6. Cook for a total of 10 hours until bananas are no longer mushy to the touch.
  7. Store in an air-tight bag or container.

Easy, fun, frugal, and so yummy!  Enjoy!

HowToMakeDehydratedBananas

Share this post:
facebooktwitterpinterest
July 29, 20160 commentsRead More