View Sidebar

Archive for category: Healthy Living Tips

Time to Tidy Up: Only Keep Stuff You Love

Time to Tidy Up: Only Keep Stuff You Love

OnlyKeepStuffYouLoveI’ve learned a lot this week, but the best thing so far – it’s ok to throw stuff away.  Really, it’s ok.  Even if that stuff is a gift from someone you love.  It may be a wonderful gift that had great intentions, but over the years, that gift sat on a shelf and collected dust.  It’s taken up a piece of real estate in your house and over the years you can’t seem to part with it since it was a gift.

You know what I’m talking about – that candle that you burned a few times and then you stuffed it in the very back of your kitchen cabinet because you got another one you liked better.  Or, it’s the quilt that someone made you as a wedding present.  While the quilt is lovely, it doesn’t match the decor of your house, or even of your guest room, so it’s been sitting in a box for 15 years.  Or, maybe it’s that collection of items from your favorite sports team – the mugs, light-up beer steins (and you don’t even drink beer), hats, coasters, posters, soda can cozies, tickets from games you have attended, and on and on – while you love this sports team, you may not love all the gifts you are given year after year with their logo plastered on it.

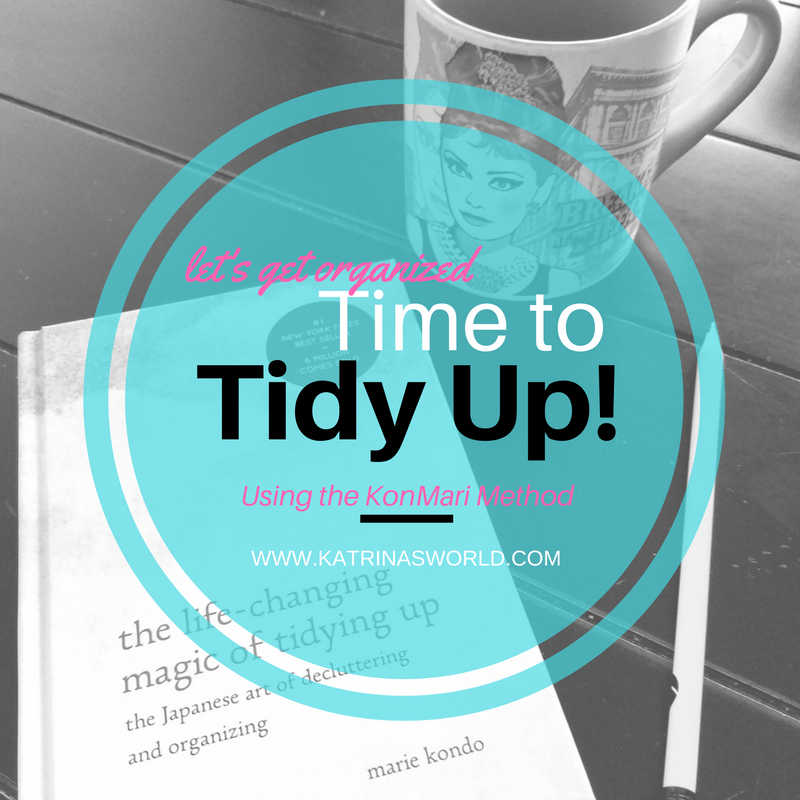
I know how you feel though – being stuck with a gift and feeling like you have to keep it just because you love the person who gave it to you.  In Marie Kondo’s book, The Life-Changing Magic of Tidying Up, she says, “Too many people live surrounded by things they don’t need ‘just because.’”  Most people have no idea how much space these things are taking up in their homes.

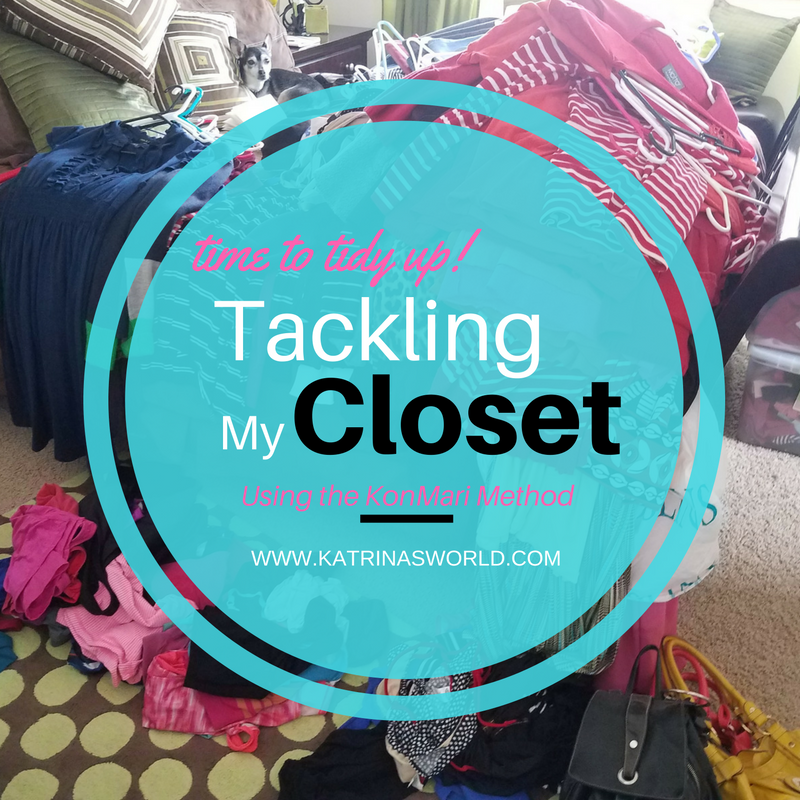
For me, I’ve seen this truth to be true – I can’t believe that in my already orderly (or so I thought) house I found 16 bags of things just taking up space that I didn’t want anymore, and I’m only just beginning.  The question to ask yourself when sorting through gifts is “Does this spark joy?”   Simple as that.  You have to remember that gifts are just things that are used to convey someone’s feelings for you – and after they have given you the gift, the gift’s purpose has been fulfilled.  Think about that.  It’s so true and my mind is blown.  This makes me think about gifts in a whole new light – both gifts I receive and gifts I give – honestly, it makes me want to try a lot harder when I’m giving a gift to someone.

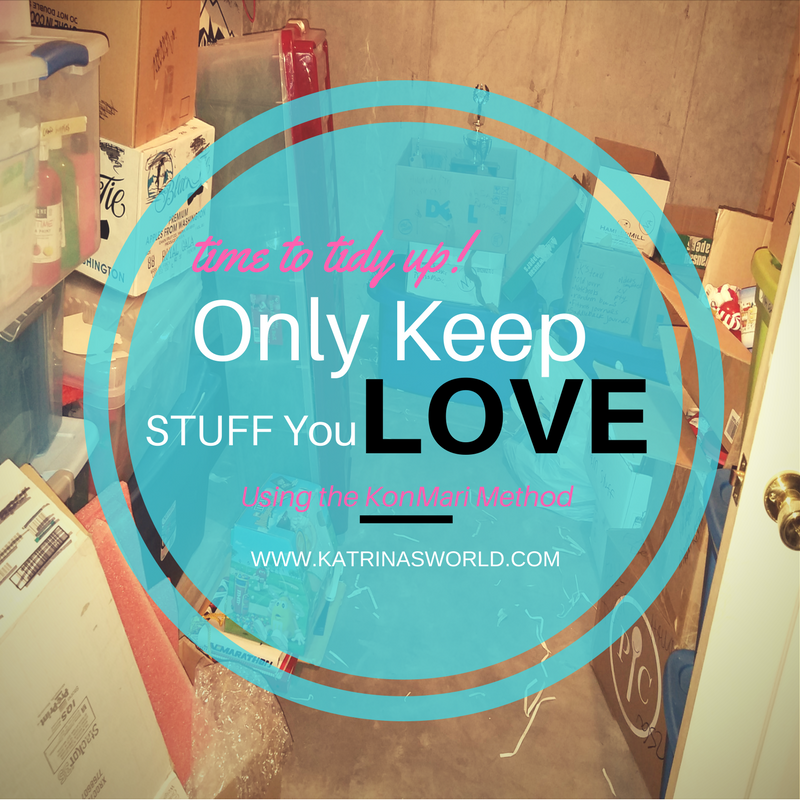
While some gifts are hard to part with, others are easy to discard.  You can part with that engraved china plate you got as a wedding gift that has sat in a box for your entire marriage.  Yes, it was a gift, but do you even remember who gave it to you?  This happened to me yesterday.  We tackled our storage room.  This room holds a giant pile of boxes that are old grade school papers, trophies from Awana, diplomas and awards from DECA and FBLA, Coca-Cola collections, M & M collections of everything you can dream of shaped, stuffed or imprinted with an M & M on it, wedding gifts, old cards and letters, etc.  It was intense.  I can’t believe how much we threw away!  We had so many empty boxes that we had saved and intended to use for shipping gifts to people.  Silliest thing ever, because we maybe ship 3-4 boxes a year!  We had enough boxes and shipping materials to ship boxes for the next 20 years or more!  Not only were these boxes taking up a ton of space, so were all the boxes of momentos.

We spent 5 hours working on this room and have made some great progress, but we still have a long way to go.  The funny thing, I noticed my attitude change over the course of the day.  I was super excited to get started on the room – I loved seeing all the things we were able to discard and haul to the trash.  Once we started unpacking my M & M collection and my box of unexpected photos from college, I started to get really stressed.  I didn’t know what to do with this stuff.  I panicked.  We kept going and I had to walk away for awhile.  I was getting totally overwhelmed.  There were boxes overflowing with packing peanuts,  piles of sorted item we were going to donate, and piles of discarded items.  Just walking from the storage room to the the stairs was like walking through a mine field.  We cleared a path and I set aside all my momentos to deal with at a later time.  The photos and special memory items are the items you sort through last.  Thank goodness, because I like to take photos of everything!

I unpacked boxes that have been packed since I moved into my house 10 years ago.  I had boxes of decor items that don’t match my current house and honestly I didn’t even remember I had them.  I found a really cool set of metal lamps that I really like, but have no problem selling instead of keeping.  In fact, I’m not only donating items, but finding a lot that I can sell on VarageSale.  I have listed over 100 items since I’ve begun my tidying journey and I’m loving the extra money that I’m making.

I’m super proud of my husband as well, he loves to collect stuff and tends to have multiple collections of things,  let’s see, there is the Coca-Cola collection, the Star Wars Lego collection, and the Broncos collection.  I tend to look at these things as ways to collect dust, which drives him crazy.  He thinks I’m boring because I don’t really collect anything.  Yep, we are a perfect match!  He did make some great decisions on things he was willing to part with and we have big plans for our storage room.  We are going to add some shelves and I’m so excited!  Our compromise, I have to find a place to display his Coke collection because he unpacked it all!  I still have to figure this one out.  :)

Needless to say, I survived the day, we still have a ton to do, but we made a huge dent in our stuff that I’m super proud and excited.  As I work through the whole house, I’m finding that I have a ton of storage totes and bins that I no longer need – as I’ve discarded most of the items that used to be in them.  I’m also loving reading Marie Kondo’s book because there are just times in your life when you just need someone to tell you it’s ok to throw stuff away.  I also feel relieved that you really only need to keep stuff that you truly love.  How is your tidying journey going?

OnlyKeepStuffYouLove

Share this post:
facebooktwitterpinterest
January 16, 20170 commentsRead More
Time to Tidy Up: Tackling My Closet

Time to Tidy Up: Tackling My Closet

ClosetMarie Kondo’s book, The Life-Changing Magic of Tidying Up, says the best place to start tidying in your home is your closet.  Well, I did it.  Oh-my-goodness.  That was a HUGE job, but it didn’t hurt nearly as much as I thought it would.  Phew.  I’m glad it’s over and I can’t believe how clean I feel – not just because my closet is clean, but my overall life is starting to feel cleaner, and I love it!

Are you ready to begin tidying your life?   Well, here is how you at least tackle your closet.  First of all, Marie says you should gather every last bit of your clothing in your entire house and put it all in one pile on the floor.  I laughed out loud when I first read this.  I remember thinking that I could just leave a few coats and gloves in the downstairs closet and not worry about them, as well as keep my swimsuit in the laundry room –  but the book says to gather every last bit of clothing – gloves, hats, coats, everything.  If you don’t get every last piece you won’t fully immerse yourself in the process…I drug my feet because it seemed like a lot of work, but eventually I grabbed a laundry basket and gathered everything and hauled it upstairs to my room.  I took every single piece of clothing out of my closet – shirts, jeans, fancy dresses, suits, bras, purses, scarves, etc.. – EVERYTHING!!!

I even pulled out my precious tubs of maternity clothes (which I had 3 giant plastic tubs worth) which I swore I would never get rid of.  The dust on top of, behind, and around these maternity tubs was thick, and I was beyond terrified to get rid of any of it.  I’ve had such a journey the last 11 years of being a mom and so many memories are tied to those maternity clothes.  I could not imagine going through them, let alone getting rid of any of them, but I pulled them out of the closet and piled them up with everything else.

After it was all piled up on the floor I sorted it into clothing types and tackled my shirts first.  I was doing great at discarding shirts that were lumpy, stained, pilled, and had holes in them until I found the pink glitter chihuahua shirt.  I got stuck.  I sort of freaked out.  I put it in the discard pile and then I grabbed it back out.  I panicked.  That shirt has such deep memories.  Does is spark joy?  Yes, it does.  It sparks all sorts of memories of a wonderful life I’ve had with my spouse.  I got that shirt while I was dating my husband and was dreaming of marrying him, having kids and of one chihuahuashirtday having a little white chihuahua that I would name Lucy.  For real.  I loved pink, glitter and little dogs and felt like my whole life was ahead of me.   Great memories that make me wish life was simple again.  I cannot part with that shirt, even though I’m fairly positive that I”ll never actually wear it again.

I continued on with my sorting and then my daughter walked in to see what I was up to.  She immediately asked if we could do her room too!  That’s my girl!  Love her!  It’s funny how if you start organizing your own life, that others watching want to do the same thing.  This also applies to my husband.  When he got home that night, he was so amazed at the transformation of my side of the closet that he immediately starting pulling things out of his side of the closet to discard.  :)

Back to my process – I started to fill up bags and bags of clothes to be donated – it’s was liberating and felt wonderful!  When everything else was sorted, I finally tackled the tubs of maternity clothes.  I had to scrape off a layer of dust just opening them.  Ewww.  I plunged ahead and was really surprised when I made it through the first tub and easily discarded all of it.  Nothing sparked joy.  All of the items in the first tub were very  big and out of style – they were 11 years old and from my first pregnancy – I was gigantic when I was pregnant with my oldest.  I hated everything about being pregnant with him.  I was uncomfortable, sick all the time, hungry all the time, wore very big maternity clothes, and when I picked them up and examined them, they gave me a feeling of yuck.

In the donate bag they all went and this process continued until I came to the last tub with all my cute clothes from when I pregnant with my daughter.  I loved being pregnant with her.  I was super thin because she made me sooo terribly sick all the time that I could barely eat, it was summer and I love summer maternity clothes, and overall I felt like a rock-star mommy.  It was one of the best years of my life.  I loved the attention of being pregnant, I felt cute the whole 9 months, and I was elated to be having a girl!  I loved all my maternity clothes I wore during that time – they were colorful, cute, and I would wear them all again if I had another baby.  I even loved my maternity swim suit – and honestly, who can say they love a swim suit?  Needless to say, I kept about 12 items, including my swimsuit and that was all I kept from my 3 big maternity tubs.  These items fit in a small diaper box.

I’m so glad I took the plunge and opened up those bins – because it taught me I was holding onto memories that I didn’t need to hold on to anymore.  I don’t plan to have any more kids, but if I do, then I still have a few cute items that I love dearly.  I’m sure at some point down the road, I will discard that box, but for now, I’m so proud of myself for purging 3/4 of a category of things I had that were not exactly what I thought.  I didn’t need to take up a huge space in my closet holding onto things that I didn’t really even like when I further examined them.  Again, it’s liberating to get rid of them!  I also know that someone else could use all of those clothes that I no longer needed, so I posted 3 garbage bags of maternity clothes size Small, Medium, and Large on a local Free Facebook group that I’m a part of and all 3 were picked up the next day by ladies who needed them.  It’s a win-win!

It only took me 3 hours to complete my closet.  I spent the next hour vacuuming, dusting and cleaning my closet floor which had not seen the light of day in probably 6 years.  When you have so much crammed in a tiny space it’s more effort than it’s worth to clean under and around it.  Right?  I love all the white space on my side of the closet now.  Love it!

I learned a lot about myself by the items I decided to keep.  Sorting through your clothes tells you a lot about who you are.  I discarded a lot of things that I’ve held onto for a long time – fancy dresses, high heels, jeans, suit jackets from my working days, etc.  I held onto my leggings, tunics, yoga pants, athletic gear, and running shoes.  Wow.  It’s weird to even write that.  My fashion sense and lifestyle have changed a lot in the last 20 years (yes, there were things in my closet that I’ve had for 20 years).  Honestly, I’m not sure what this says about me.  I’m still thinking about it and mulling it over in my head.  My husband did comment that I used to dress a lot fancier when he first met me.  Of course I questioned him about that and he just said it was an observation, but it did worry me.  Am I looking to mom-ish?  Just stuff to think about.  Wow, who knew that tidying my home could go so deep?

So, what has tidying taught you?  Have you sorted your closet?  How did that go?  Can’t wait to hear all about your tidying journey….

Closet

Share this post:
facebooktwitterpinterest
January 7, 20170 commentsRead More
Time To Tidy Up: Hello 2017

Time To Tidy Up: Hello 2017

TimeToTidyUpI’m happier than I should be that 2016 is over.  I have no regrets about leaving that year behind me.  It wasn’t a horrible year, it wasn’t a great year, it was just a year and I’m over it.  I’m happy to welcome 2017 and have high hopes that it’s going to be epic!  While I’m trying not to get ahead of myself or of what the Lord has in store for me this upcoming year, I’m still feeling very intrigued about what lays ahead.  Last year was an “off” year for me.  I struggled a lot with my emotions, my overall body contentment, and mostly with my sense of overall purpose and direction in my life.  Heavy stuff huh?  Yeah, I know, and it was hard to wallow through it all.  I feel like dreams I had built, toiled over, and angrily suffered through were laid to rest, friendships were built and lost, days of pounding my body in the gym were accomplished with not much gain, and I registered defeat in more ways that I want to count.  I learned that God doesn’t always write out His plans for your life on a neon sign, clear as can be, so you don’t mistake it – He just asks that you trust Him even when you have no idea what is going on.  I was in that space so many days this year that I found myself doubting who God is and if He really is there for me – and in all my days on this earth, I have never doubted God’s love for me.  Now do you see why I’m read for this year to be over?

I learned something else about myself that I’ve never seen before – I don’t function well in chaos.  I get stressed out really easy and it doesn’t take much for me to go from “good mommy” to “crazy-stressed-angry mommy” when the situation becomes overly chaotic.  When I get stressed, I instantly go into overdrive of trying to de-stress – I clean my environment, I yell, I get mad at my kids, I start making lists, little things out of place make me yell even louder, I demand that my kids pitch in and help me clean, I just turn into a crazy person trying to tidy up and ultimately calm down.  A classic example is everyday when my older kids get home from school.  They come in the door and set their backpacks in the middle of the floor of the kitchen and start unpacking them, wanting to show me everything inside – the craft they made in class, their math test, the art project they are working on, their spelling homework, etc.  All while my youngest (who has been home with me all day) is vying for my attention as well, wanting a snack, drink and to show me anything he can find at that moment to show me, plus he is usually singing a silly song about stinky farts at the same time (lovely – huh?).  While all this is going on, I usually have music playing in the background (yep, because I’m crazy) and am trying to prepare a snack so we all can re-fuel before starting homework.

This mom does not smile through all of this, nor do I patiently listen as they show me items, or do I calmly ask them all to sit at the table so we can eat a snack.  I try to take a deep breath, then my heart starts to beat faster as I get more and more stressed by all the chaos of kids, dishes, dinner prep, laundry, homework, shoes in the middle of the floor, backpacks not hung up, etc and I end up yelling and throwing a mommy tantrum trying to get everything back to a normal stress level.  This is so dumb.  It usually puts the kids in a bad mood and me too and then we all spend more time trying to repair our attitudes towards each other.  By this time, it’s 5pm, and I’m stressed and starving and all I want to fix my sour mood and chaotic feelings running through me is a brownie.  Yep, I love brownies – but you all know that.  I’ll make dinner and simultaneously whip up a batch of brownies.  You see where I’m going??  It’s a horrible downward spiral.  Chaos and stress are detrimental to me and where I’m going in life.   I know I can’t eliminate all the stress in my life, I mean seriously, I have 3 kids, life is going to be stressful, but I can help identify the stress triggers and work at fixing them.

A very dear friend of mine told me about a book she is reading, The Life Changing Magic of Tidying Up, by Marie Kondo.  This book caught my attention because I love to organize and I love the feeling of a tidy house.  I love to discard stuff, sell it, and move on.  My house is usually very tidy – but it could be so much more simplified.  I’m totally hooked on this book.  I’m only about 40 pages in, but I’m hooked!  I’m going to spend the next couple months reading this book, doing what it says and tidying up my home, heart, and my life, and I plan to blog about as I go.

In her book, Marie asks “Why do you want to tidy?”  When you can answer that question you can begin.  For me, I want to tidy to because I want to have a clean and orderly house so that I don’t feel stressed out by my environment.  If I’m not feeling stressed out by my environment I can pay more attention to trying new things, having more fun with my family, eating healthier foods, getting better sleep, and overall being a better wife and mom.  I do believe that all of these things can be accomplished by having a tidy home, because your home is so much more than just the place to lay your head at night.  As a mom, it’s my work – it’s where I put my time and energy, it’s how I make money, it’s how I prove my worth, it’s who I am at this point in my life.

I’m hopeful that God teaches me a lot about myself and the deep-rooted reasons why I do some of the same things over and over and expect a different result.  I want change, which is really hard to say, because I HATE change, but I’m ready for it.

Have you read Marie Kondo’s book?  What did you think?  What did you learn?

TimeToTidyUp

Share this post:
facebooktwitterpinterest
January 3, 20170 commentsRead More
How To Clean An Artificial Christmas Tree

How To Clean An Artificial Christmas Tree

CleanChristmasTreeLast year around Christmas time I was really struggling with my allergies and I noticed that my allergies seemed a lot worse right after we put up our 15 year old artificial Christmas tree.  I didn’t make the connection at first, but I did notice 6 weeks later when we finally packed up our tree that I almost instantly started breathing better.  A light bulb went off in my brain and I realized that my Christmas tree may have been a big part of why I had been so sick during the holidays last year.

This year I’m determined to feel better during the holiday season and I decided it was time to clean my Christmas tree, afterall, we’ve had if for 15 years!  Honestly, I can’t believe that we have had this tree for so long, it’s super ‘old-school’, has individual branches that have to be put on one by one, but it works and it looks really nice once it’s all set up.  Don’t get me started on how long it takes to assemble, add the lights, and ornaments (I hate this job as much as my kids love it), but today I’m thankful that I don’t have a pre-lit tree because if I did I would never be able to clean it so thoroughly.  I’m super envious of all of you out there that have pre-lit trees – the ease, the simplicity…oh man….(drooling over here), but I’ve also heard horror stories about how the lights malfunction.

ANYWAYS, back to the topic at hand….as I was saying, I’ve got this super old, fake tree and I was bound and determined to clean it.  I begged my husband to get out the box from the basement and haul it outside to our back porch – it was warm, 80 degrees the day we did this.  Here’s what you need to do:

Supplied Needed:

  • Spray bottle
  • Lemon Juice
  • White Vinegar
  • Hose
  • Artificial Christmas Tree

Directions:

I gathered up the kids and had them lay out each branch of the tree.  I gave each of them a spray bottle filled with a solution of white vinegar, lemon juice, and water and asked them to spray all sides of each branch.  I let that sit for about 15 minutes and then I got out my hose and sprayed off each branch completely.  After all the branches were thoroughly rinsed, I shook off the excess water from each one and laid them on the dry patio in direct sunlight.  I left them outside to dry for the entire day and flipped them over about 5 hours into the day.  At the end of the day I made sure they were completely dry and then I packed the branches back up in the box and was done.

They smelled GREAT too!  I’m super hopeful that this cuts down on the all the dust and helps keep my crazy allergies at bay.  It sounds time consuming, annoying, and hard to do, but it was super easy, quick and I feel great knowing it’s over and done with!  Hope that helps!  You can do it too!  Let me know if it helps – I’m crossing my fingers that it will help my household breathe better this Christmas!

CleanChristmasTree

Share this post:
facebooktwitterpinterest
October 25, 20160 commentsRead More
How To Make Dehydrated Apples

How To Make Dehydrated Apples

HowToMakeDehydratedApplesYes, I know it’s summer, but my house smells like Fall!  What’s better in fall you say?  Apple Pie!  Yes!  My house smells like Apple Pie and here’s why – I’m dehydrating a bunch of apples today!  Yummy!!  A neighbor came over and when I opened the door she told me my house smelled amazing and she wondered what candle I had burning!  I told her I didn’t have a candle lit, but was making dehydrated apples – she was impressed!

I’m not kidding, it really smells awesome and I can’t wait to make them this fall!  They are so easy too – and I think they are even easier than the dehydrated bananas.  I sort of feel like I’m a pro now at this (ya know, because I have dehydrated one batch of bananas and one batch of apples – :) – yep just pass me my pro status ribbon right now!) – so I have a few extra tips on how to make dehydrated apples quick and easy.

For starters, my dehydrator only has 4 trays – so I can’t do a lot at the same time, but I did realize you can prep a whole bunch at once and save half the batch for later.  If you have fewer trays like I do, then peel/slice/core your apples and place all the extra apples in a big bowl filled with a bit of water and lemon juice.  Cover and store in your refrigerator until you are ready to dehydrate.  I did one batch during the day (about 8 medium to large sized apples), and then cooked the second batch overnight.  This totally happened by accident, I really had no idea how many apples my trays would fit so I ended up buying a 5 bags of 3 apples each on clearance at the grocery store and prepped all of them at once.  :) Silly me!  But I was happy to prep and save all the extras.  It worked out great!

One other tip, if you plan to do this a lot, then make sure you get an Apple Peeler/Slicer/Corer machine – I know Pampered Chef sells one, so does Williams and Sonoma (which is the brand I have – I’m lucky though, I found mine at Goodwill for $5).  I tend to use mine a lot and it makes the whole process so much faster and super fun for your kids to help with!  It’s messy and sticky, but a lot of fun!

How To Make Dehydrated Apples

You will need:

  • Food dehydrator
  • Small spray bottle
  • 15 medium size apples
  • Juice from one lemon or 2 Tbs of bottled lemon juice
  • Cinnamon
  • PAM or Misto filled with Olive Oil
  1. Peel, core, and slice the apples the same thickness so they dry evenly – 1/4″ is perfect.  I used an Apple Peeler/Slicer/Corer.  I picked mine up at Goodwill for $5 and I LOVE it!  Makes peeling super fast and my kids love to help with it.  Also, apples are sliced the same thickness which is helpful for drying.  If you don’t have a Peeler/Slicer/Corer, you can do it manually.
  2. Lightly srapy your dehydrator trays with olive oil or PAM to help with sticking.
  3. Place apples in single layer on dehydrator trays.
  4. Spray apples with lemon juice from your small spray bottle to keep the apples from turning a yucky brown color.
  5. Lightly sprinkle cinnamon on the apples.
  6. Turn on the dehydrator and set to 135 degrees.
  7. Check apples in 5 hours and consider flipping over (again depends on the design of your dehydrator).
  8. Cook for a total of 10 hours until apples are no longer mushy to the touch.
  9. Store in an air-tight bag or container.

Trust me, you will love how these make your house smell!! Yummy!  Making these apples yourself is super healthy and such a great way to help stretch your grocery budget!  My kids LOVE them and they are a super healthy snack for school!  Win win!

If you try them, let me know what you think!

HowToMakeDehydratedApples


Share this post:
facebooktwitterpinterest
August 2, 20160 commentsRead More
How To Make Dehydrated Bananas

How To Make Dehydrated Bananas

HowToMakeDehydratedBananasHi everyone!! It’s been awhile – and for that I’m sorry!  I’ve been so busy this summer enjoying every last second with my kids that I’ve made a conscience effort to step back from my blog.  It’s been a breath of fresh air actually – just taking a break.  I’ve really needed the time to think and just listen to the Lord speak into my life.

My summer has been great!  I hope yours has been too!  We’ve enjoyed tons of time with our family and friends, doing fun crafts – like making homemade chalk (I’ll discuss this in a later post – it was AWESOME!), spending much-needed time with cousins, lots of runs through the neighborhood and of course, tons of swimming!  My adorable neighbor across the street blessed with me with a hand-me-down food dehydrator and I’m trying it out today!  Which is what this post is really about actually – so Katrina, stop rambling all about ‘what you did this summer’….seriously!

We were at the grocery store this morning and there was an awesome deal on ripe bananas – as well as a of bags of discount apples.  All a sudden I remembered that my neighbor said I could have her old dehydrator and viola!  We purchased  about 3lbs of bananas and a couple pounds of apples and as soon as we got home we started prepping the bananas for the dehydrator.  I had the bright idea that I should spray the apples with lemon juice using a small water bottle instead of hand-dipping each one – just seemed a lot faster, and on a day like today, when I still have to find a place for a ton of cereal that I bought with some HOT coupons for super cheap this morning, I don’t have time to waste!  Plus, my daughter has a friend coming over soon and my oldest has a baseball game in a few hours!  I’m happy to report that it took less than 3o minutes to slice, arrange, and spray about 3lbs of bananas.  My dehydrator only has 4 trays, and I filled them all up, so I’ll have to wait until tomorrow to process the apples.  I’m super excited for how quick and easy this process was!  I set the temperature to 135 degrees and I guess they should be done in about 10 hours.

This is a great way to use up those over-ripe bananas that your kids think are too mushy to eat!  We tend to have a lot of those each week – seems like I never know what fruit my kids will want to eat and the poor bananas get ripe so fast!  The ripe ones will taste a lot sweeter too!  I plan to try blueberries soon and of course the apples!  So excited!  I love new ideas like this and also love finding frugal and fun ways to stretch every dollar – especially with our food budget!

How To Make Dehydrated Bananas

You will need:

  • 3-5lbs of ripe bananas (depends on who big your dehydrator is)
  • Food dehydrator
  • Small spray bottle
  • Juice from one lemon or 2 Tbs of bottled lemon juice
  1. Peel and slice the bananas the same thickness so they dry evenly – 1/4″ is perfect
  2. Place bananas in single layer on dehydrator trays
  3. Spray bananas with lemon juice
  4. Turn on the dehydrator and set to 135 degrees
  5. Check bananas in 5 hours and consider flipping over (again depends on the design of your dehydrator)
  6. Cook for a total of 10 hours until bananas are no longer mushy to the touch.
  7. Store in an air-tight bag or container.

Easy, fun, frugal, and so yummy!  Enjoy!

HowToMakeDehydratedBananas

Share this post:
facebooktwitterpinterest
July 29, 20160 commentsRead More
Where I Eat: MAD Greens

Where I Eat: MAD Greens

MADGreensmainI’ve been on a health journey for years now. I feel like as soon as I turned 30 my body has fallen apart.  I’ve been working very hard at figuring out what is the new normal for me and repairing the damage that was done.  In this process I’ve learned so much about how my body actually functions, and the best things to put in it – foods, supplements, etc. (If you are interested in the supplement I recommend read this post that I wrote about it.)

Every morning I wake up with the very best intentions of eating right the entire day, because I have really seen the effects of what food does to my overall energy levels (I wrote several blog posts a year ago all about my Health Quest journey that you can read about here), but, let’s be honest, some days I just don’t do that well.  One of my errands might take a lot longer than I expected, or I forget that we have soccer pictures after practice and all a sudden I’m left in a pinch and having to pick up fast food.  It’s nice when there is a place you can go that has very fresh and healthy options not only for adults, but for kids as well – hello MAD Greens!  I love this place – the entire restaurant is full of amazingly healthy, fresh food that your whole family will love!

Everything MAD Greens prepares, from salad dressings to bread, is made in-house from scratch with the freshest ingredients, and you can taste it!  MAD Greens serves salads, wraps, soups, paninis, and juice combinations, and their salads are very interesting to say the least!  I’ve tried several and love their Ty Cobb salad the most – full of flavorful crisp ingredients and I’m very partial to their hand-crafted Ranch dressing.  So yummy!  I like any excuse to go to MAD Greens and with their new location in Castle Rock, CO, its very close to me!

Last weekend I took the whole family to the Castle Rock, Colorado location of MAD Greens to enjoy dinner and it was excellent!  I have three kids and my two oldest were MADGREENS2very excited to eat salad – and I’m not kidding!  They love salad and one of the choices on the kid’s menu is a mini salad, where they got to pick their own salad ingredients and they were very happy about this!  They each made a unique salad and once they picked their hand-crafted salad dressing they were set.  I love seeing my kids enjoy healthy food!  My youngest son chose to have mac n’ cheese and was very pleased about this – I’m still working on him – he’s not a big fan of ‘green stuff’ yet.  :)  The kid’s meals also come with a homemade cookie, and drink.  Of course, my youngest said the cookie (which was gigantic) was the best part.  My daughter said her favorite thing was the salad and the feta cheese and my oldest son really liked the homemade balsamic vinaigrette salad dressing.  To each their own, right?

Honestly, I’m just really happy that my kids are willing to try new things, especially very healthy things, and that they like them.  Now if we can only get my youngest son to enjoy the ‘green stuff’ as much as his siblings…he’s a work in progress! My husband, got a wrap and loved picking out each individual ingredient that went inside it.  He said it was delicious, and he also decided to try their Strawberry Cooler Juice, which was really refreshing – in fact, we all tasted it.  I think my youngest could have had the whole thing if we would have let him!

We enjoyed our experience and would highly recommend trying MAD Greens!  Besides being a genuinely healthy option for your whole family, I love knowing that MAD Greens is committed to their food and the communities they are located in by using produce from local farmers, and they strive to use organic ingredients whenever possible.  For me, I find that very exciting knowing that the meal I’m about to eat is from the farm down the road!  Plus, I live in community that has a small-town feel, and we all love to support our community by shopping local – what could be better than enjoying a fresh meal of superb healthy ingredients that came from my neighbor?  I just love it $25MADGreensand am so impressed by this business model.

Check out MAD Greens and go enjoy a healthy salad!  Currently they have locations in Colorado, Arizona and Texas.

Just for Katrina’s World readers, I’m giving away TWO $25 gift cards to TWO lucky readers to enjoy a meal at MAD Greens.  All you need to do is THREE SIMPLE THINGS:

  1. Comment below and tell me who you would take to enjoy a meal at MAD Greens and why?
  2. Then share this giveaway on your Facebook page and encourage your friends to enter.
  3. If you have not done so already, LIKE my Katrina’s World Facebook page.

Winner will be picked randomly on April 15th and notified via email.  Winner must supply their address for shipment.  Thank you to MAD Greens for sponsoring this giveaway.  Visit MAD Greens on their Facebook page - or on Twitter or Instagram.  

Thanks for reading!  Hope you enjoy your meal as much as we did!  I can’t wait to go back!

MADGreensmain

Share this post:
facebooktwitterpinterest
March 16, 201611 commentsRead More
How To Shop From Your Own Pantry

How To Shop From Your Own Pantry

howtoshopfromownpantry“Mom, what’s for dinner?”

Let me paint a picture for you.  It’s 4pm, you just walked in the door from picking up your kids at school.   All of your kids are talking at the same time, telling you about their day, as well as throwing all the papers from their backpacks at you.   It’s at that moment that you realize you forgot to set out anything for dinner.  While you try to focus on helping your kids with homework, you can’t stop thinking about what to make for dinner.

If I were in “super-mom” mode, I would have planned my dinner for that day and had the meat defrosting by 10am.  When I’m in “super-duper-mom” mode I wouldn’t even have to think about what I’m having for dinner because I would have planned that over the weekend before I did my grocery shopping.   I would know, down to the day, exactly what I was having for dinner for the full week.  I try to have my menu planned each week before the week begins, but let’s be honest, I’m a super busy mom and sometimes my “super-duper-mom” cape goes missing for weeks on end.

When I’ve neglected to plan, that means it’s time to go shopping in my own pantry!  The great thing about being a howtoshopfromownpantry2couponer is that I usually have a well-stocked pantry.  Not only have I purchased stockpile items at rock bottom prices, but now I can literally go shopping in my own pantry to create a very inexpensive meal for my family!  While this can seem daunting, it’s actually quite fun to see how creative I can be with whatever we have on hand.  It’s also a great way to save money!  Rather than running to the store to pick up a few items that would create a meal for that evening, I’m saving money by putting in a little extra effort to be creative and use what I have.

Honestly, I enjoy the challenge.  I don’t know that everyone would, but for me, it kicks the chore of cooking dinner up a notch!  I challenge you, beginning Monday of next week, to dig through your pantry and try to create a week’s worth of meals.  Plan it out ahead of time, and only go to the store if absolutely necessary – and if you do go to the store, go only ONCE – pick up all the little filler items you need to complete your meals and then make it work!  If you can shop from your own pantry for a full week every couple months, just think of how much money you would save!  This next year I’m going to try to do this every few months!
I’ll let you know how it goes and I’d love to know if you already do this and if you have any tips for me?!

Happy cooking! Happy Saving!

howtoshopfromownpantry

Share this post:
facebooktwitterpinterest
December 31, 20150 commentsRead More
Dump Salad Recipe

Dump Salad Recipe

Yeah, ok, so this may sound gross, but it’s a super delicious salad!  I like to call this my Dump Salad because it’s loaded dumpSalad
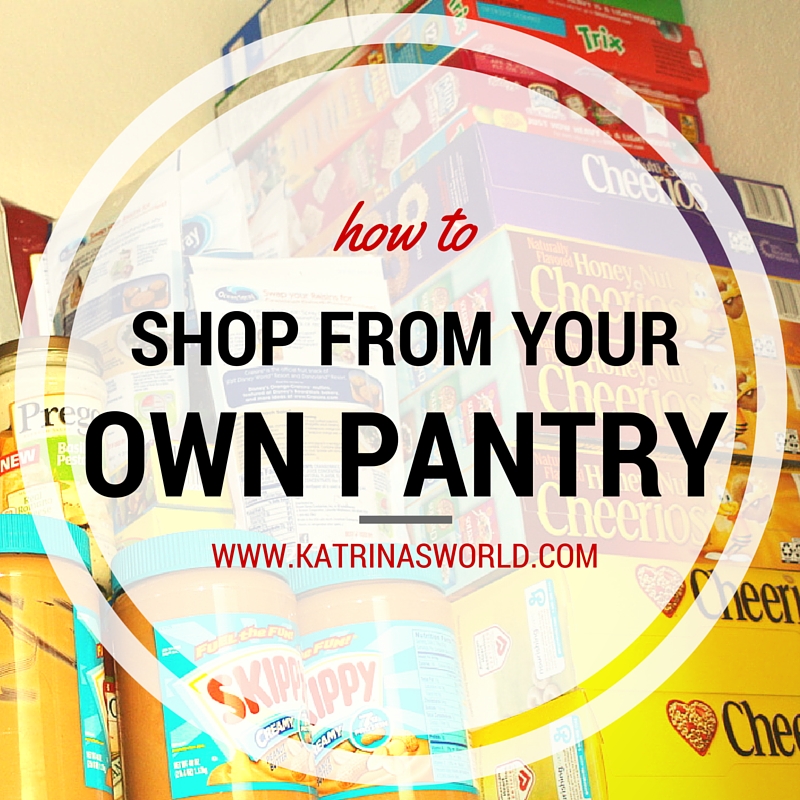
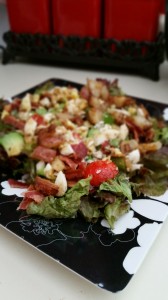
with wholesome goodies that are also leftovers from several other dinners cooked last week!  :) You must try this and let me know what you think!


Dump Salad:

  • Red or Green leaf lettuce – washed and ready to eat
  • 2 slices of crispy Bacon
  • Crispy chunks of cooked red potatoes
  • Blue Cheese chunks
  • Sliced Tomatoes
  • Avocado slices
  • 1 Hard-boiled egg
  • Bacon Dressing

Bacon Dressing:  This is super easy to make – I like to cook my bacon slices on a roaster pan with slats in my oven so all the bacon drippings drip to the bottom pan.  After I cook the bacon I reserve all the drippings and pour them into a sauce pan and add a little olive oil and balsamic vinegar and crumble 1 slice of bacon into the mixture.  Heat until it boils and you are done! It’s amazing and tastes so good on the salad.  A little goes a LONG way too!20150901_121351

The salad is super easy to throw together, especially if you have made some of the other items days earlier for other recipes.  I like to use bacon in a lot of recipes, so I’ll cook up a whole package and try to use the rest throughout the week when I need an extra crunch.  We also keep a lot of hard-boiled eggs on hand for the whole week to grab as a quick protein packed snack and my kids love them in their lunches.  The red potatoes are a regular side item in our house for dinners, so I just usually make a little extra any time I make them so we can use them in this salad, or as a side along with scrambled eggs for breakfast in the morning.  When all these things are on hand, this is a really easy lunch salad to throw together!

Keep in mind, you can “dump” other things on this salad from your leftovers, some sliced chicken, or ham, might be really nice.  You can also experiment with different cheeses, like feta and maybe some olives and pepperoni slices would be yummy as well.  There are so many ways you can go with this idea of a Dump Salad, so have fun and experiment!

Hope you love it as much as I do!  Try it out and let me know what you think, and let me know if you made any substitutions!  I’d love to know what combination of ingredients you like best!  Hugs!


Share this post:
facebooktwitterpinterest
September 2, 20150 commentsRead More
Health Quest – 5 Month Update

Health Quest – 5 Month Update

20150806_081743I thought I would take a few minutes to give you all a quick update on my Health Quest!  I posted a personal status update yesterday after a trip to the doc and it generated a lot of buzz, so I figured I better let you all know the same great news.  I went to my general practitioner yesterday for my yearly physical and the sweet nurse who did my vitals gave me some great news.  You all know what’s is like to walk down the dreaded long hallway to the scale…right?? Well, I hopped right on that scale and she told me that I’d lost 20.5lbs since March!  WAHOO!!!  I had been in to the doc in March when I had a terrible head cold that I could not shake – which was right before we started our Whole30 journey!  So, I’m happy to say that in as little as 5 months I’ve lost 20.5lbs and I’m stoked!  Pretty cool I think!  We are still sticking with a lot of ideas we learned during our Whole30 journey and it’s clearly working out great for us!  We are not nearly as strict, but I’ve learned a lot of things about my body in the last couple years and even just in the last 5 months that I know are truths for me.  If I do one thing I will achieve the same result – every time.  For example, even though I love a crusty piece of sourdough bread, I know without a doubt now that if I eat it I will get a headache and it will add weight to my body.  I don’t always make the best choices, but at least I know going in what my consequences will be.

Besides eating better, I’m making strides with my feet issues.  Lately I have been able to run a lot more, which I can tell is increasing my metabolism – and we all know that the more you run or exercise the easier it becomes and the more SA_cover_295x448enjoyable it is.  I love running – but it’s hard to do – it’s not easy and even though I love it, I hate it just as much – especially when I’m smack dab in the middle of a workout and it’s 90 degrees outside (it’s been really hot here lately).  But I love how it makes me feel afterwards – even if it’s only 2 miles!  I also love the all-natural, sugar-free products I’m using now – AXIO for energy and Protandim for overall body function and recovery – both make a HUGE difference in being able to go for a 2-3mile run EVERY day!  Before I started using these products I could not run every day – my body hurt too bad after a run to keep up – I would need a day in between to recover (even from a small run).  Now, I’m good to go every day and sometimes even twice a day.  I’m feeling a HUGE energy increase – which if you have read my blog for awhile, you know the biggest issue I faced a couple years ago was being so incredibly tired all the time.  In fact, if you are interested and in learning more about Protandim and how it activates Nrf2 and helps to slow the natural aging process in your body, you should read an eBook I wrote all about it – it’s pretty cool stuff!  I’m giving away this eBook FREE to all my loyal readers.  You can download it here, now.  Let me know what you think of it!

Someone asked me recently to put up my Top 10 List of Getting Healthy tips, so here you go:

Katrina’s Top 10 List to Get Healthy:

  1. Do a Whole30 Challenge – (you can read all my posts about my Whole30 challenge – read now).
  2. Limit white flour and refined sugar.
  3. Get 8-10 hours of sleep each night.
  4. Find a form of exercise you love and get MOVING! (running, dancing, yoga, spinning, biking, walking..etc).
  5. Take an all-natural Nrf2 activating supplement – like Protandim.
  6. Limit your sugary drinks – replace with an all-natural Nrf2 activating drink like AXIO.  (I still drink AXIO first thing each morning and it does so much more for my mood and mental focus than coffee ever did! – BUT, I still have a cup of coffee with my girlfriends every now and then).
  7. Enter an exercise challenge group – sign up for a race, or enter a losing weight challenge at your gym – anything to boost your motivation to get moving.
  8. Exercise with your kids – play with them at the park, go for walks and bike rides, sign up for a family race!
  9. Create a list of go-to, easy, healthy recipes and keep those staples on hand so you always have what you need to create a quick, healthy family dinner.
  10. Find an amazing chiropractor, use them regularly, and give acupuncture a try! I love mine – Dr. Carrie Wolf of Wolf Chiropractic in Parker, CO!  If you go see her, tell her I sent you!

My big bad medical degree told me to tell you all of that!  :)  Kidding (no medical degree for me – I have an art degree), that’s just what I’ve learned lately.

Well, that’s about it!  Hugs!

Share this post:
facebooktwitterpinterest
August 13, 20150 commentsRead More