View Sidebar

Archive for August, 2016

Why We Didn’t Take Out A Loan For A Car

Why We Didn’t Take Out A Loan For A Car

GreenCarBeing an adult is hard.  So hard.  Here is what happened yesterday – are you ready for this? Here goes:

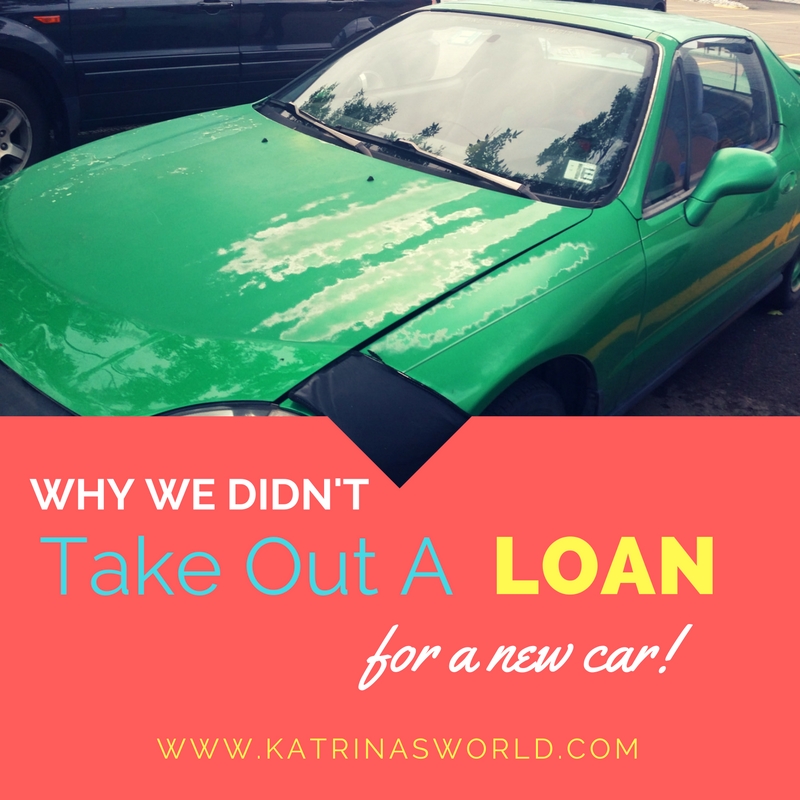
We need a new car in a bad way.  Check this baby out - this is my Dave Ramsey-mobile.  It’s a 1993 Honda Del Sol convertible- lime green with lime green wheels too, it was a beauty when I got it 20 (gasp) years ago!  Who’s heard of Dave Ramsey?  Love him!  Consider him my uncle – for real.  Around our house we call him ‘Uncle Dave’.  Well, when we first got married someone gifted us with his Total Money Makeover class and our newly married lives were completely changed – in a good way.  We had $90,000 of debt when we got married and after taking his class we were able to pay off ALL of that debt in just over a year.  We got extra jobs, worked out butts off and lived on beans and rice.  Boy was I glad the day we payed the last debt off!  I was so proud of us.  Now, we are 14 years down the road, still living debt-free and we never fight about money – which his a huge plus!  BUT, we really need a new car – this lovely Dave Ramsey-mobile is on it’s last leg.  In fact, this was the first car I ever had – I was given this car when I turned 16 and that was a long time ago.  My poor husband drives it to work every day and has for years and years.  It’s reliable, paid for, and does the job, BUT, we are ready to move on to another vehicle that we can fit our kids in.  As you can see, this car is on a 2-seater, and that’s hard when you have 3 kids.  :)

My husband would like to get a truck.  I would too.  Who knew that trucks hold their value so well?!  Not us.  We know that now.  We have been saving for a few years, anything extra at the end of the month and we have managed to save $10,000 – which is not going to buy much of a truck – we’d need double that to get something that will last us a few years.  The little green car will need some work put into it this fall – and honestly, the repairs are not worth it if we plan to sell it.  Which means, we are in the market for a newer vehicle.  Although my husband would really like a truck, we have decided the ‘adult’ decision would be to get a car instead, as they are cheaper, and we can pass it to our son who will be driving (gasp) in 6 years (ohmygosh, I can’t believe he will be driving soon….ahhh!!!).

With new resolve, we began looking on Craigslist for a 4WD car with lower miles, and only a few years old.  Imagine my luck when not an hour earlier someone had posted a gorgeous sedan, a few years old, with only 30,000 miles on it – asking only $13,800, claiming he was a very motivated seller.  The blue book on this car was mid $14,000′s.  My bargain hunting ears were fully listening.  Just what I like to hear – someone who took really good care of his car and was motivated to sell and offering a deal.  Of course we had to go check it out.  We were the first people to call him and went to go look at it last night.  It was beautiful.  Really – just like his Craigslist post said.  We talked him down to $13,400 – even better deal.  Then we shook hands and said we needed to talk about it first and he said he would hold our place in line, but he did have a handful of others interested.  We talked about it the whole way home.  What would you have done?

It’s now the next day and we don’t have the car.  I’m super sad, but feel like it was the right decision.  I had this crazy dream last night about Dave Ramsey shaking his head at me and saying “When will you learn?” and then right after that the roof was blown off our house.  For those of you who are familiar with Dave Ramsey, he teaches about this thing called ‘Murphy’s Law’ and buying a car that we can’t afford is like asking ‘Murphy’ to move into our spare bedroom.  You see, the only way we could’ve purchased that car with CASH was to take the $10,000 we had saved for it and then dip into our Emergency Fund for the rest.  I don’t care who you ask, buying this car is not an emergency.  Both of us feared that if we did take money from our Emergency Fund that a real emergency would take place and we wouldn’t be able to pay for it because we just bought a new car with the emergency money.  We also had the option of taking out a small loan to pay for the extra, but by the time we paid off the interest this car that was such a ‘great deal’, was not as good of deal anymore.

I’m sad that we missed out on this car and am hoping that when the time is right, we will find another great deal.  BUT, I’m still bummed and hate having to make ‘adult’ decisions.

So, do you drive a Dave Ramsey-mobile?  I’d love to see a photo of it!  You can upload a photo of it on my Katrina’s World Facebook Page  - just tag #DaveRamseyMobile and tell me all about it!

I’d also love to know what you would do in our situation?!  Tell me all about it – whether you agree or not!

GreenCar

Share this post:
facebooktwitterpinterest
August 25, 20160 commentsRead More
How To Make Homemade Chalk

How To Make Homemade Chalk

ChalkThe summer was amazing and I’m totally honest when I say this – not long enough!  I love to have my kids at home with me – YES, they drive me absolutely crazy, but I love to have them around – all three of them.  We had many days this summer that we needed to escape the heat and be indoors and when we found ourselves bored, we’d either start baking or crafting!

About 7 years ago, my older son and I tried to make homemade chalk and let’s just say, it’s didn’t go so well.  It involved a little bit of food coloring, and toilet paper rolls and by the time they dried 5 days later, we never could get them out of the toilet paper rolls!  Don’t ask…it was a bad idea.  :)  So, it was time to try again!

I did some looking around on Pinterest and found a great post by Princess Pinky Girl all about how to make your own sidewalk chalk.  We followed this recipe pretty closely, but I’ll be honest, I didn’t really measure everything and we used a lot more of the paint – I mean, who doesn’t want super bright colors?  I’m so glad I did – because our colors are very bright and we love using these!  I did learn a few things along the way that might make it easier and we had to let our dry a lot longer than just 24 hours.  Thank you to Princess Pinky Girl for your great post and ideas!  Below is my recipe and what we actually did that worked well for us.

Homemade Chalk Recipe

Gather these items:

  • Plaster of Paris Dry Powder (I actually found a huge tub of this at a garage sale for super cheap – been saving it for awhile now – you can get at any craft store).
  • Tempura Paint (I got 7 bright colors and got big sizes – 24oz bottles.  In fact, another great sale was going on at my local Hobby Lobby – I paid only $1 for each bottle).
  • Silicon molds or candy melt molds (I had a silicon Pampered Chef cupcake flower mold that worked great, and I found a big stack of candy melt molds at a garage sale for less than dollar – these worked really well).
  • Over-sized Disposable Cups
  • Plastic Spoons
  • Water

Homemade Chalk Recipe:

  • We mixed up each color in it’s own disposable cup.  I started out with only 3 colors to begin with because I have 3 kids and I wanted them each to have their own color to mix up.  The amount of colors you can make with this recipe will depend on how many molds you have on hand.
  • Fill each up with about 3/4 cup of water.
  • Add about 1/2 cup of paint to the water and mix well.  The original recipe says about 1/4 cup of paint, but I really liked the super bright colors that we achieved with 1/2 cup of paint.
  • Next, add 1 cup of the dry plaster of paris powder and start mixing with your plastic spoon.  Make sure to mix really well. I did learn that if you don’t get it all completely mixed up you will have pockets of the white plaster of paris in your dry chalk that never was mixed with the paint.  Not a big deal, but a bummer when you are coloring something very specifically and it turns white on you.  Double check after your kid’s arms tire out and make sure there are no lumps.
  • Pour into molds and then very gently pound the mold on the counter to pop any air pockets or bubbles and to completely flatten.
  • You can layer different colors in the molds, just don’t mix them up.  It does dry really with really cool swirls in it!
  • Let them dry for at least 3 full days before you try to take them out of the molds.  They will pop right out of a mold when they are completely dry.  If you try to pop them out too early, they actually crumble and that’s a bummer (Yes, this happened a few times to us).  The candy molds dried much faster than the cupcake molds.  If you can set them to dry outside in full sunlight, they may dry much faster.  You can tell when they are NOT dry by the color change they have – the outside edges will dry lighter in color and if the inside is still well, it will look darker and like it has a wet spot on it.  My candy molds dried in about 3 days and I did eventually turn them upside down so that the bottom would dry as well – a few actually fell out once they were dry.  My flower regular sized cupcake molds took about 6 full days to dry all the way and at about 4 days, I was able to pop them out and I set them outside in the full sun to dry all the way, which took another 2 days.

The colors are awesome, bright, and so fun to use!  My kids love this chalk and we have a great time using it!  I love this chalk because the colors are so fun!  I can’t wait to make this recipe again and am now on the hunt for more fun candy molds at garage sales.  I would totally recommend making this chalk with your kids – it’s really a fun, easy, and pretty quick craft!  I’m hoping to make some as gifts to give the cousins for Christmas!

Let me know if you try this recipe out!  Happy coloring!

Chalk

Share this post:
facebooktwitterpinterest
August 16, 20160 commentsRead More
How To Make Dehydrated Apples

How To Make Dehydrated Apples

HowToMakeDehydratedApplesYes, I know it’s summer, but my house smells like Fall!  What’s better in fall you say?  Apple Pie!  Yes!  My house smells like Apple Pie and here’s why – I’m dehydrating a bunch of apples today!  Yummy!!  A neighbor came over and when I opened the door she told me my house smelled amazing and she wondered what candle I had burning!  I told her I didn’t have a candle lit, but was making dehydrated apples – she was impressed!

I’m not kidding, it really smells awesome and I can’t wait to make them this fall!  They are so easy too – and I think they are even easier than the dehydrated bananas.  I sort of feel like I’m a pro now at this (ya know, because I have dehydrated one batch of bananas and one batch of apples – :) – yep just pass me my pro status ribbon right now!) – so I have a few extra tips on how to make dehydrated apples quick and easy.

For starters, my dehydrator only has 4 trays – so I can’t do a lot at the same time, but I did realize you can prep a whole bunch at once and save half the batch for later.  If you have fewer trays like I do, then peel/slice/core your apples and place all the extra apples in a big bowl filled with a bit of water and lemon juice.  Cover and store in your refrigerator until you are ready to dehydrate.  I did one batch during the day (about 8 medium to large sized apples), and then cooked the second batch overnight.  This totally happened by accident, I really had no idea how many apples my trays would fit so I ended up buying a 5 bags of 3 apples each on clearance at the grocery store and prepped all of them at once.  :) Silly me!  But I was happy to prep and save all the extras.  It worked out great!

One other tip, if you plan to do this a lot, then make sure you get an Apple Peeler/Slicer/Corer machine – I know Pampered Chef sells one, so does Williams and Sonoma (which is the brand I have – I’m lucky though, I found mine at Goodwill for $5).  I tend to use mine a lot and it makes the whole process so much faster and super fun for your kids to help with!  It’s messy and sticky, but a lot of fun!

How To Make Dehydrated Apples

You will need:

  • Food dehydrator
  • Small spray bottle
  • 15 medium size apples
  • Juice from one lemon or 2 Tbs of bottled lemon juice
  • Cinnamon
  • PAM or Misto filled with Olive Oil
  1. Peel, core, and slice the apples the same thickness so they dry evenly – 1/4″ is perfect.  I used an Apple Peeler/Slicer/Corer.  I picked mine up at Goodwill for $5 and I LOVE it!  Makes peeling super fast and my kids love to help with it.  Also, apples are sliced the same thickness which is helpful for drying.  If you don’t have a Peeler/Slicer/Corer, you can do it manually.
  2. Lightly srapy your dehydrator trays with olive oil or PAM to help with sticking.
  3. Place apples in single layer on dehydrator trays.
  4. Spray apples with lemon juice from your small spray bottle to keep the apples from turning a yucky brown color.
  5. Lightly sprinkle cinnamon on the apples.
  6. Turn on the dehydrator and set to 135 degrees.
  7. Check apples in 5 hours and consider flipping over (again depends on the design of your dehydrator).
  8. Cook for a total of 10 hours until apples are no longer mushy to the touch.
  9. Store in an air-tight bag or container.

Trust me, you will love how these make your house smell!! Yummy!  Making these apples yourself is super healthy and such a great way to help stretch your grocery budget!  My kids LOVE them and they are a super healthy snack for school!  Win win!

If you try them, let me know what you think!

HowToMakeDehydratedApples


Share this post:
facebooktwitterpinterest
August 2, 20160 commentsRead More